I still remember the first time I tried to make French macarons. It was a disaster of epic proportions—my kitchen looked like a powdered sugar crime scene, and the macarons themselves resembled tiny frisbees that could double as hockey pucks. Fast forward through three failed attempts, a mountain of dishes, and a very patient dog who kept hoping I'd drop something edible, and I finally cracked the code. But here's the twist: I didn't just want perfect macarons. I wanted the campfire magic of s'mores wrapped in that delicate French elegance. The result? S'mores French Macarons that will make you question everything you thought you knew about both classic desserts.
Picture this: a crisp autumn evening, the windows fogged up from the oven's warmth, and the intoxicating aroma of toasted marshmallows mingling with rich cocoa. That's what happens when these babies start baking. The first time I pulled these out of the oven, my neighbor actually knocked on my door—she thought I had a campfire going in my apartment. That's how authentic the scent is. But these aren't just about smell; they're about capturing that perfect moment when you're sitting around a campfire, chocolate melting on your tongue while marshmallows turn golden on a stick.
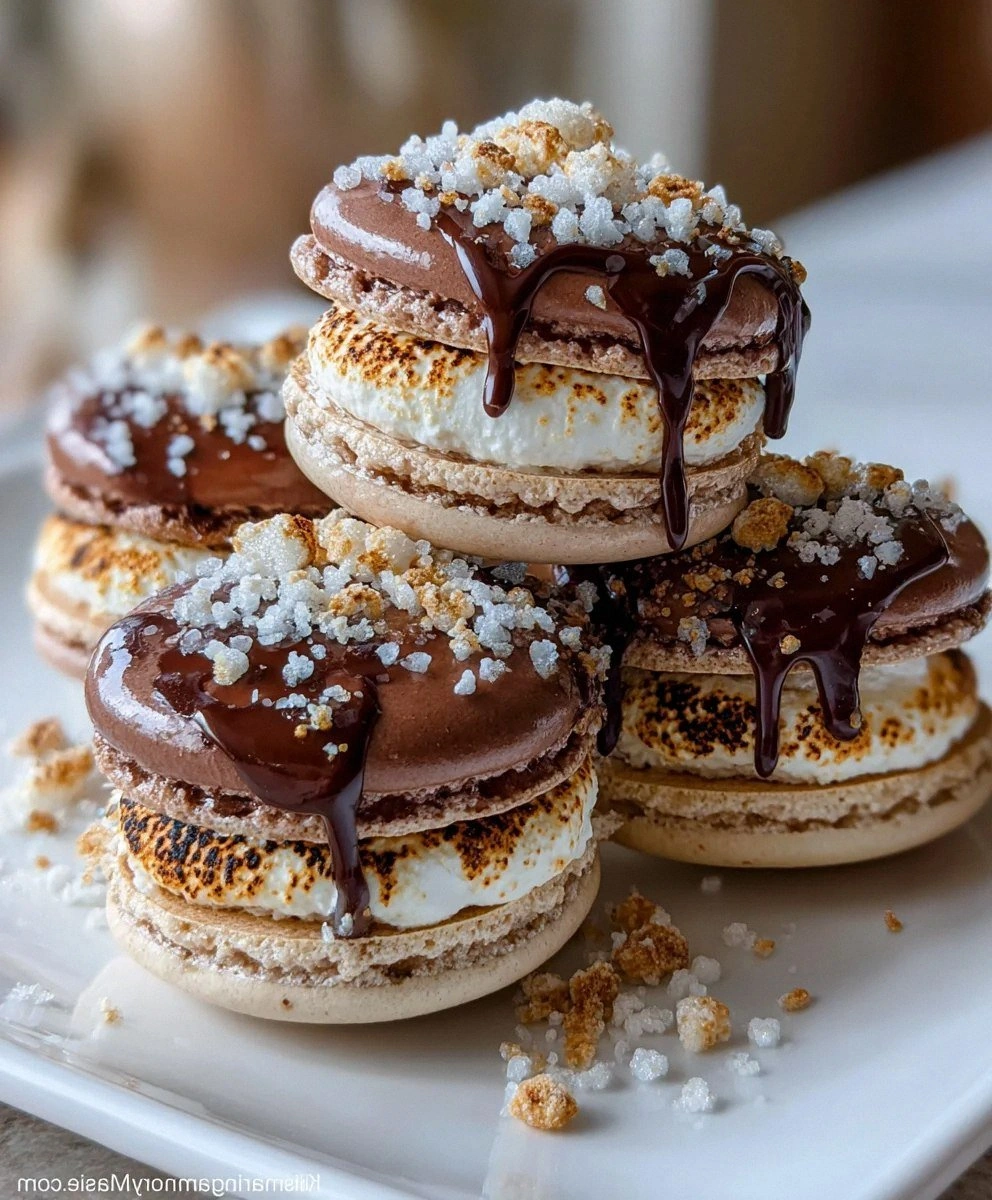
What makes these macarons absolutely irresistible is how they manage to be both sophisticated and nostalgic at once. The shells are impossibly smooth with those perfect little feet that every baker dreams about, but bite into one and you're transported back to childhood summers. The filling is where the real magic happens—marshmallow fluff meets chocolate ganache with tiny graham cracker pieces that add that essential crunch. It's like someone took your favorite campfire treat and gave it a Parisian makeover, complete with a little black dress and a beret.
Let me walk you through every single step—by the end, you'll wonder how you ever made it any other way.
What Makes This Version Stand Out
Flavor Explosion: Most s'mores-inspired desserts just taste like chocolate and sugar. These macarons layer the flavors like a symphony—first you get the delicate almond, then the rich cocoa hits, followed by that unmistakable marshmallow creaminess, finishing with the honey-kissed graham cracker crunch. Each bite tells a complete story rather than just shouting "sweet" at your taste buds.
Texture Perfection: The contrast is what kills me every single time. You've got that trademark macaron shell—crisp on the outside, slightly chewy within—giving way to the silkiest marshmallow-chocolate filling punctuated by those addictive graham cracker crumbs. It's not just soft or crunchy; it's a whole journey through every possible texture that makes eating fun.
Beginner-Friendly Technique: I know what you're thinking—macarons are impossible. But here's my confession: I developed this recipe specifically for people who've never made macarons before. The cocoa powder actually helps stabilize the meringue, making it more forgiving than traditional macarons. Plus, I'm sharing every single trick I've learned through my many failures so you can skip right to success.
Party Show-Stopper: Bring these to any gathering and watch what happens. People will hover around the dessert table, taking Instagram photos before they even taste one. The combination of "ooh la la" French pastry with down-home s'mores flavors creates this unexpected wow factor that makes everyone feel like they're at a fancy bakery and a campfire simultaneously.
Quality Ingredients Shine: Because each component is distinct, you can really taste the difference when you use good chocolate, real vanilla, and fresh egg whites. This isn't a recipe where everything gets muddled together—every ingredient gets its moment to shine, so splurge on the good stuff. Your taste buds will absolutely notice.
Make-Ahead Magic: Here's a secret that changed my entertaining game: these actually taste better after a day in the fridge. The flavors meld and intensify, the shells soften just slightly, and suddenly you've got this perfect harmony that you can't achieve when they're fresh. I make these on Thursday for Saturday parties, and they're always the first thing gone.
Seasonless Versatility: While s'mores scream summer, these macarons work year-round. In winter, they're cozy and comforting. In spring, they're unexpected and delightful. In fall, they pair perfectly with hot cider. I've served them at everything from Fourth of July barbecues to Christmas cookie exchanges, and they always fit right in.
Inside the Ingredient List
The Flavor Base
Egg whites are the unsung heroes of macaron success, and here's why they matter so much more than you'd think. Fresh egg whites are great, but aged ones are where the magic really happens. As they age, some of the moisture evaporates, concentrating the proteins and creating a more stable foam that won't collapse on you. If you skip this step, you'll still get macarons, but they might spread more and develop those dreaded lopsided feet that make every baker cry into their apron.
Almond flour isn't just providing flavor—it's the backbone of your entire cookie. Too coarse and you'll have bumpy shells that look like they have acne. Too oily and your batter will separate faster than middle schoolers at their first dance. Look for super-fine almond flour that's been blanched (skins removed) for the smoothest shells. If you can only find the coarse stuff, blitz it with some of your powdered sugar in a food processor until it's almost powdery.
Cocoa powder is where this recipe really strays from tradition, and I love it for that. Natural cocoa adds a fruity, bright chocolate note that keeps the macarons from feeling too heavy. Dutch-processed gives you that deep, Oreo-like flavor that's more authentic to the s'mores experience. Both work beautifully—just don't try to substitute melted chocolate here. The liquid will throw off your entire ratio and leave you with chocolate puddles instead of cookies.
The Texture Crew
Powdered sugar does more than sweeten these beauties—it's actually helping create that perfectly smooth top that makes macarons so Instagram-worthy. The ultra-fine crystals dissolve instantly, preventing any graininess that could mar your shells. When you're measuring, don't pack it down like brown sugar. Fluff it up first, then spoon it into your measuring cup like you're handling a sleeping baby bird.
Cream of tartar is your insurance policy against over-whipped egg whites that look gorgeous for five minutes then deflate into a sad puddle. Just a pinch helps stabilize those proteins, giving you a meringue that holds its shape through mixing, piping, and baking. If you don't have it, you can substitute with a few drops of lemon juice, but cream of tartar gives more consistent results. It's cheap, lasts forever, and will save you from more baking heartbreak than I care to count.
The Unexpected Star
Marshmallow fluff might seem like just a shortcut, but it's actually brilliant here. The commercial stuff has stabilizers that prevent it from weeping or separating, which means your filling stays picture-perfect for days. Plus, it's already got that perfect marshmallow flavor without any work on your part. If you're feeling ambitious, you can make your own marshmallow cream, but honestly? The store-bought version works so well that I stopped making my own years ago.
Graham crackers are where most people go wrong—they crush them too finely and lose all that textural interest. You want a mix: some pieces that are practically powder (for flavor throughout) and some that stay chunky (for those delightful crunch moments). Pulse them in short bursts in your food processor, checking every few seconds. Think of it like making breadcrumbs—some should be sandy, some should be pea-sized.
The Final Flourish
Vanilla extract might seem basic, but please don't use the imitation stuff here. With so few ingredients, every single one needs to pull its weight, and real vanilla adds those complex, almost bourbon-like notes that make people ask "what's that amazing flavor?" after they bite in. I use a full teaspoon, which some people think is too much, but trust me—it's exactly enough to make these unforgettable.
Dehydrated marshmallow bits are my secret weapon for making these look as good as they taste. They add visual appeal and little pops of concentrated marshmallow flavor that make people smile. You can find them in the hot chocolate section or online—they're basically the marshmallows from Lucky Charms, minus the artificial colors. If you can't find them, regular mini marshmallows work too, but they won't keep their shape as well.
Everything's prepped? Good. Let's get into the real action...
The Method — Step by Step
- Start with your aged egg whites—they should look slightly thicker than fresh ones, almost like they've lost a bit of their sparkle. Pour them into the bowl of a stand mixer (or a large bowl if you're using a hand mixer) and let them come to room temperature for about 30 minutes. Cold egg whites won't whip up as voluminously, and this small wait makes the difference between macarons that rise like champions and ones that stay stubbornly flat. Add the cream of tartar now, before you start whipping, so it can distribute evenly through the whites.
- Begin whipping on medium-low speed until the whites get foamy and opaque, like a bubble bath that's just started running. This should take about 2-3 minutes—don't rush it. Once they're foamy, increase the speed to medium and start adding your sugar, just a tablespoon at a time. The slow addition helps the sugar dissolve completely, preventing any gritty bits that could cause your shells to crack. Keep whipping until you get stiff peaks that stand up proudly when you lift the beater.
- While your meringue is doing its thing, sift together the almond flour, powdered sugar, and cocoa powder not once, not twice, but three times. Yes, three. I know it's annoying, but lumpy macaron shells are the saddest thing in the baking world. Use a fine-mesh sieve and really work the almond flour through—any bits that won't pass through the mesh should be discarded, not forced through. This step ensures your shells will be as smooth as silk.
- The macaronage (folding) is where most people panic, but stay with me here—this is worth it. Add half the dry ingredients to your meringue and fold with a rubber spatula, cutting through the middle and scooping around the sides. Don't stir like you're mixing brownies; think more like you're gently incorporating clouds. After about 15 folds, add the rest of the dry ingredients and continue folding until the batter flows like lava. The test: draw a figure-eight with your spatula—the ribbon should hold for about 10 seconds before disappearing.
- Transfer your batter to a piping bag fitted with a round tip (about ½-inch diameter). Pipe onto parchment-lined baking sheets, holding the bag perpendicular to the sheet and squeezing until you get a circle about 1½ inches wide. Space them about 2 inches apart—they'll spread slightly. Here's the key: once you've piped all your shells, pick up the baking sheet and drop it flat onto the counter from about 6 inches high. Do this 3-4 times to release any air bubbles that could cause cracks.
- Now comes the hardest part: waiting. Let your piped shells sit out for 30-60 minutes until they form a skin. You'll know they're ready when you can gently touch the top without any batter sticking to your finger. This step is crucial for developing those feet, so don't rush it. If it's humid, you might need even longer—I've waited up to 2 hours on particularly muggy days.
- Bake at 300°F for 18-20 minutes, rotating the pans halfway through. The shells are done when you can gently touch the top and it doesn't wiggle or feel soft. If they still feel jiggly, give them another 2 minutes. Every oven is different, so start checking at 16 minutes. The smell should be intensely chocolatey with a hint of toasted almond—absolutely intoxicating.
- Cool completely before removing from the parchment. I know you're excited, but trying to move them while warm is a recipe for broken shells and tears. Once cool, they should lift off easily. If they're sticking, they need more time in the oven next batch. While they cool, make your filling by beating together the butter, powdered sugar, and marshmallow fluff until light and fluffy. Fold in the crushed graham crackers at the end so they stay crunchy.
- Match up shells that are similar sizes—a scale helps here, but eyeballing works too. Pipe the filling onto the flat side of one shell, staying just inside the edge so it doesn't squish out when you sandwich them. Top with another shell and press gently until the filling reaches the edges. For the full s'mores experience, roll the edges in the dehydrated marshmallow bits—they'll stick to any filling that peeks out.
- Here's the game-changer: once assembled, refrigerate these beauties for at least 24 hours before serving. I know, I know—you want to eat them now. But this rest period allows the flavors to meld and the shells to soften slightly, creating that perfect macaron texture. Take them out 30 minutes before serving so they can come to room temperature. Trust me on this one—it's the difference between good macarons and life-changing macarons.
That's it—you did it. But hold on, I've got a few more tricks that'll take this to another level...
Insider Tricks for Flawless Results
The Temperature Rule Nobody Follows
Your oven thermometer is lying to you, and it's ruining your macarons. Most home ovens run 25-50°F hotter or cooler than they claim, which is the difference between perfect shells and chocolate charcoal. Spend the ten bucks on an oven thermometer and actually use it. Once you know your oven's true temperature, adjust accordingly. My oven runs 15°F hot, so I set it to 285°F to get the actual 300°F I need. This single adjustment eliminated 90% of my macaron failures overnight.
Why Your Nose Knows Best
Here's something they don't tell you in recipes: your nose is actually the best timer for macarons. When they're perfectly baked, your kitchen will suddenly smell like the world's most amazing chocolate-almond bakery. If you smell even a hint of burnt sugar, pull them out immediately—they're overdone. This usually happens right at the 18-minute mark, but trust your senses over the clock every time. I've saved countless batches by ignoring the timer and listening to my nose instead.
The 5-Minute Rest That Changes Everything
After you take your shells out of the oven, let them cool completely on the pan for exactly 5 minutes before touching them. Then slide the whole parchment sheet onto a wire rack. This prevents the bottoms from getting soggy from steam, which is the enemy of perfect macarons. If you leave them on the hot pan too long, the bottoms get sticky and you'll lose half your shells when you try to remove them. Five minutes is the sweet spot—set a timer and walk away.
The Humidity Hack
Living somewhere humid? Don't despair—you just need to adjust your strategy. Run a dehumidifier in your kitchen for an hour before you start baking. If you don't have one, turn on your air conditioning or heat (depending on season) to dry out the air. You can also use a hair dryer on cool setting to gently blow air over your piped shells, helping them form a skin faster. My record in 80% humidity? 45 minutes to form a skin versus the usual 20 in dry conditions.
The Filling Secret
Here's what separates amateur macarons from bakery-quality ones: the filling-to-shell ratio. Most people overfill, thinking more is better. Wrong. You want just enough filling to complement the shells, not overwhelm them. I use a small cookie scoop—about 1 teaspoon per 1½-inch shell. This might seem stingy, but when you sandwich them, the filling spreads to the perfect amount. Overfilled macarons are messy to eat and the filling overpowers the delicate shells.
Creative Twists and Variations
This recipe is a playground. Here are some of my favorite ways to switch things up:
The Peanut Butter Cup Remix
Swap out the marshmallow fluff for equal parts peanut butter and honey, and replace the graham crackers with crushed pretzels. The sweet-salty combination is absolutely addictive, and the pretzels add an unexpected crunch that makes people ask for the recipe before they even finish chewing. Use milk chocolate powder instead of cocoa for the shells to really channel that peanut butter cup vibe.
The Campfire Bourbon Edition
Add 2 tablespoons of bourbon to your filling and use smoked salt instead of regular salt. The bourbon adds depth and warmth while the smoked salt brings that campfire essence even without actual flames. Toast your graham crackers in a dry pan for 2 minutes before crushing to intensify the flavor. These are dangerously good with coffee after dinner.
The Mint Chocolate Upgrade
Add ½ teaspoon of peppermint extract to your shells and use crushed Thin Mint cookies instead of graham crackers. The mint keeps the s'mores spirit alive while adding a refreshing twist that's perfect for summer parties. Top with crushed candy canes if you're making these during the holidays—they look gorgeous and taste like Christmas.
The S'mores Latte Version
Replace 2 tablespoons of the almond flour with instant espresso powder in your shells. The coffee flavor pairs beautifully with the chocolate and marshmallow, creating a sophisticated mocha vibe. Add a teaspoon of espresso powder to your filling too, but dissolve it in a teaspoon of hot water first to prevent grittiness.
The Tropical Escape
Add toasted coconut flakes to your graham cracker mixture and use coconut extract instead of vanilla in the filling. The coconut adds a tropical note that somehow works perfectly with the classic s'mores flavors. Toast the coconut in a dry pan until golden—about 3 minutes, stirring constantly—to bring out its natural oils and flavor.
The Double Chocolate Decadence
Use Dutch-processed cocoa for deeper chocolate flavor and add mini chocolate chips to your filling. The chips add little pockets of melted chocolate that mimic the classic s'mores experience. Don't overdo it—just 2 tablespoons of chips is plenty or they'll overwhelm the delicate balance.
Storing and Bringing It Back to Life
Fridge Storage
These macarons actually improve with age, but only if you store them properly. Place them in an airtight container with parchment paper between layers, and they'll keep beautifully for up to 5 days in the fridge. The key is letting them come to room temperature for 30 minutes before serving—cold macarons are sad macarons. The filling firms up when chilled, so that rest period lets the flavors bloom and the texture soften to that perfect, almost creamy consistency.
Freezer Friendly
Here's where these really shine: they freeze like champions for up to 3 months. Flash-freeze them first on a baking sheet for 2 hours, then transfer to a freezer-safe container with parchment between layers. When you're ready to serve, thaw them overnight in the fridge, then let them sit at room temperature for an hour. They'll taste almost as good as fresh, which is saying something for macarons. I've served these at parties straight from the freezer, and nobody knew the difference.
Best Reheating Method
Don't you dare put these in the microwave—they'll turn into sad, soggy puddles. If they've been refrigerated and seem too firm, just let them sit at room temperature for 30-45 minutes. For frozen ones, the overnight fridge thaw followed by room temperature rest is the only way to go. If your filling seems too soft after thawing, pop them back in the fridge for 10 minutes to firm up. The goal is that perfect middle ground where the shells are tender but the filling holds its shape.