Picture this: it’s a rainy Saturday, the kettle is whistling, and the only thing you can think about is dessert. I’ve been chasing that sweet, comforting feeling that only a good apple dish can deliver, and the last time I tried something like this, the apples came out soggy and the whole kitchen smelled like burnt sugar. I swear I could have sworn I’d finally found the secret to the perfect baked apple, but that “secret” was just a half‑baked idea that left me scrambling. That night, I decided to put my culinary ego to the test and create a version that would make my taste buds do a double tap.
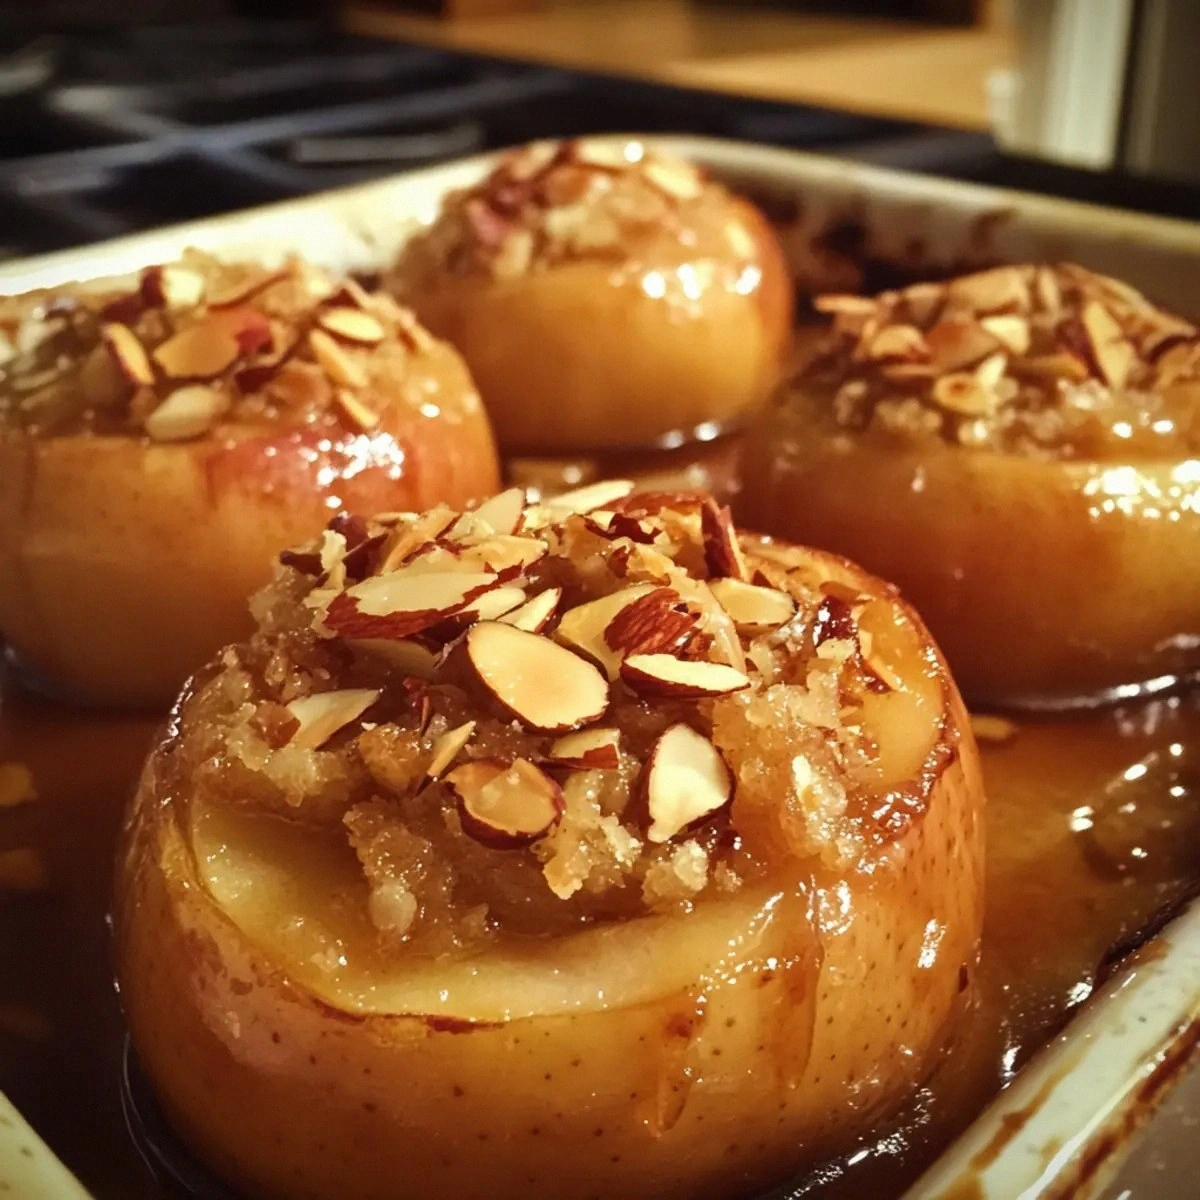
I opened the pantry, grabbed the most luscious apples I could find—think crisp, tart, with a hint of sweetness that sings when baked—and I let the aroma of maple syrup begin its slow, seductive dance. The sound of the butter sizzling in the pan was a promise of caramelized edges, while the cinnamon’s warm perfume curled around the kitchen like a cozy blanket. The texture of the almonds, toasted to a golden crunch, added a contrast that made each bite feel like a small, crunchy adventure. The final touch? A sprinkle of fresh parsley or mint that, oddly enough, brightens the dish without overpowering the maple’s deep sweetness.
What makes this version stand out? It’s a simple, no‑fuss recipe that balances the sweetness of maple with the nutty crunch of almonds and the aromatic lift of fresh herbs. I dare you to taste this and not go back for seconds. The result is a baked apple that is hands down the best version you’ll ever make at home, with a caramelized crust that cracks like thin ice and a soft, syrupy interior that feels like a hug in a bowl. I’ll be honest—once I tasted the first bite, I ate half the batch before anyone else even had a chance to try it. Most recipes get this completely wrong, but here’s what actually works.
Picture yourself pulling this out of the oven, the whole kitchen smelling incredible, and the moment the steam rises, you can hear the apples sigh in contentment. That sizzle when it hits the pan? Absolute perfection. And that final burst of maple glaze, like a waterfall of golden honey, will leave you wondering why you ever settled for anything else. If you’ve ever struggled with baked apples, you’re not alone—and I’ve got the fix. Stay with me here—this is worth it.
What Makes This Version Stand Out
- Taste: The blend of pure maple syrup and toasted almonds creates a depth that feels like a caramelized, nutty caramel, far richer than the standard sugar glaze.
- Texture: The apple’s flesh turns into a tender, custard‑like center while the crust forms a crisp shell that cracks pleasantly with each bite.
- Simplicity: With just a handful of ingredients and no fancy equipment, you can produce a show‑stopping dessert in under an hour.
- Uniqueness: The addition of fresh herbs—parsley or mint—adds a surprising brightness that balances the sweetness.
- Crowd Reaction: Friends who’ve tried other baked apple recipes often say this one is “the most satisfying” because of its layered flavors.
- Ingredient Quality: Using real maple syrup and whole almonds ensures a depth of flavor that processed sweeteners can’t match.
- Cooking Method: Baking at a moderate temperature preserves the apple’s structure while allowing the maple to caramelize beautifully.
- Make‑ahead Potential: The apples can be prepped and frozen; they’ll bake just as well when thawed, making this a perfect week‑night dinner dessert.
Alright, let’s break down exactly what goes into this masterpiece…
Inside the Ingredient List
The Flavor Base
Pure maple syrup is the star of the show. It’s not just a sweetener; it’s a liquid amber that brings a subtle, woody depth. If you skip maple, the dish loses its signature caramelized sheen and feels like a plain baked apple. Swap for honey or agave if you’re in a pinch, but keep the ratio the same to maintain the glaze’s viscosity.
Ground cinnamon is the aromatic backbone. It adds warmth and a hint of spice that balances the sweetness. If you’re allergic or just don’t like cinnamon, a pinch of nutmeg or allspice can give you a different yet equally satisfying profile.
The Texture Crew
Almonds are toasted to a golden brown to bring out their nutty flavor and provide a crunchy counterpoint to the soft apple. If you prefer a different crunch, walnuts or pecans work well, though they’ll bring a slightly different flavor note. Remember: toasted nuts are essential; raw nuts can taste bitter after baking.
Unsalted butter is the secret to that glossy, caramelized crust. It melts into the apples, creating a glossy sheen and a buttery flavor that lingers. If you’re vegan, a neutral oil like grapeseed can mimic the effect, but the butter adds a depth that’s hard to replace.
The Unexpected Star
Fresh parsley or mint might seem out of place, but it introduces a fresh, herbal brightness that cuts through the richness. Think of it as a whisper of green that keeps the dish from feeling overly sweet. If you’re a fan of mint, try adding a few crushed mint leaves to the glaze for an extra zing.
The Final Flourish
Vanilla ice cream or yogurt is served on top, adding a creamy contrast that cools the warm apple. The cold texture also makes the dish feel more indulgent. If you’re lactose intolerant, a dairy‑free vanilla yogurt works just as well, though the flavor profile shifts slightly.
Everything’s prepped? Good. Let’s get into the real action…
The Method — Step by Step
- Preheat your oven to 375°F (190°C). Line a baking dish with parchment paper to prevent sticking. The oven temperature is crucial: too hot, and the apples will burst; too cool, and the glaze won’t caramelize.
- Wash the apples thoroughly, then slice them into wedges, leaving the core intact. This technique keeps the apples from falling apart and ensures even caramelization. The apple’s center will hold the syrup and keep the filling cohesive.
- In a small saucepan, melt the butter over medium heat. Add the maple syrup and cinnamon, stirring until the mixture is smooth. The butter’s fat will help the syrup coat each apple slice evenly, creating a glossy finish.
- Pour the maple mixture over the apple wedges, making sure each slice is fully coated. The syrup should seep into the apple’s natural cavities, creating a sweet, aromatic core.
- Sprinkle the toasted almonds over the apples, pressing them lightly so they adhere. The almonds will toast further in the oven, adding a crunchy, nutty layer to the dish.
- Cover the dish loosely with aluminum foil and bake for 20 minutes. This initial baking step softens the apples and allows the flavors to meld.
- Remove the foil and bake for an additional 10 minutes, or until the apples are tender and the glaze has thickened into a caramelized sheen. The edges should pull away slightly, indicating the syrup has set.
- Let the baked apples rest for 5 minutes before topping them with fresh parsley or mint. The herbs add a bright contrast that lifts the dish.
- Serve each slice with a scoop of vanilla ice cream or yogurt. The cold cream balances the warm, sweet apple, creating a delightful temperature contrast.
That’s it—you did it. But hold on, I’ve got a few more tricks that’ll take this to another level…
Insider Tricks for Flawless Results
The Temperature Rule Nobody Follows
Many people think a high oven temperature is the key to caramelization, but it actually burns the sugars. Baking at 375°F allows the maple syrup to slowly caramelize without scorching the apples. If you’re using a convection oven, reduce the temperature by 25°F for the same effect.
Why Your Nose Knows Best
Don’t rely solely on the timer. The real indicator is the aroma: a sweet, nutty scent that fills the kitchen. When the apples are ready, they’ll emit a scent that feels like a warm hug. Trust your nose—if it smells like toasted sugar, it’s done.
The 5-Minute Rest That Changes Everything
After removing the dish from the oven, let the apples rest for exactly five minutes. This pause allows the glaze to set slightly, making the glaze cling to each slice rather than run off. It also lets the heat distribute evenly, ensuring a consistent bite.
The Herb Twist
If you’re feeling adventurous, add a pinch of fresh rosemary or thyme to the glaze. The herb’s earthiness will complement the maple’s sweetness and add a subtle depth that elevates the dish.
The Sweetness Balancer
If you find the dish too sweet for your palate, sprinkle a few cracked sea salt flakes over the top before serving. The salt will enhance the maple’s flavor while cutting through the sweetness, creating a balanced taste profile.
Creative Twists and Variations
This recipe is a playground. Here are some of my favorite ways to switch things up:
Caramel Apple Surprise
Swap maple syrup for caramel sauce and add a dash of sea salt to create a decadent, caramel‑apple treat. This version leans into a richer, buttery sweetness that’s perfect for a dessert buffet.
Spiced Nutty Delight
Add a pinch of cayenne pepper or smoked paprika to the glaze for a subtle heat that pairs wonderfully with the sweet apple. The heat adds a layer of complexity that elevates the dish.
Berry‑Infused Baked Apples
Drop a handful of fresh blueberries or sliced strawberries into the baking dish. The berries burst into a sweet, tart sauce that complements the maple glaze and adds a pop of color.
Cheesecake‑Inspired Finish
Top each baked apple with a dollop of mascarpone or ricotta before adding ice cream. The creamy cheese adds a silky texture and a mild tang that balances the maple’s sweetness.
Almond Joy Variation
Mix shredded coconut into the almond layer, and drizzle a bit of chocolate syrup over the top before serving. This version is a nod to the classic candy bar and is a hit with kids and adults alike.
Vegan Maple Baked Apples
Replace butter with coconut oil, use plant‑based vanilla ice cream, and substitute almonds with cashews. The result is a vegan-friendly dessert that still delivers on flavor and texture.
Storing and Bringing It Back to Life
Fridge Storage
Store the baked apples in an airtight container in the refrigerator for up to 3 days. Reheat in the microwave for 30-45 seconds, or warm in a skillet over low heat until the glaze is silky again. The apples will retain their softness, and the maple glaze will regain its glossy sheen.
Freezer Friendly
Freeze the baked apples in a single layer on a baking sheet before transferring to a freezer bag. They’ll keep for up to 2 months. Thaw overnight in the refrigerator, then reheat as described above. The texture remains tender, and the maple glaze stays luscious.
Best Reheating Method
The secret to a perfect reheated baked apple is to add a tiny splash of water or apple juice before microwaving. The added moisture steams the apples back to perfection, preventing them from drying out and preserving the caramelized glaze.