I was standing in the middle of my kitchen, staring at a box of stale, store‑bought Twinkies that had been sitting on my counter for a month. The air was thick with the scent of disappointment, and the only thing that kept me from throwing the whole batch into the trash was the memory of that one childhood birthday when the bright yellow sponge cake had melted into a gooey, sweet‑tooth‑friendly cloud. I dared myself, as any good foodie does, to recreate that moment of bliss and, more importantly, to prove that homemade Twinkies could be a revelation. The challenge? Make them so airy that the filling seems to float on a cloud and so sweet that you can’t resist a second bite—though I dare you to taste this and not go back for seconds.
Picture the scene: the oven preheats to a crisp 350 °F, the timer hums softly, and the kitchen smells like vanilla, butter, and a faint hint of nostalgia. As the batter swirls in the bowl, the light catches on the glossy eggs, and the sweet, sugary aroma begins to mingle with the buttery undertones. The sound of the whisk is rhythmic, almost hypnotic—like a metronome that keeps your heart beating in sync with the batter’s rise. You can almost taste the first bite before it even hits your tongue, the soft, pillowy exterior giving way to a velvety marshmallow filling that tastes like childhood dreams.
What sets this version apart from every other Twinkie recipe you’ll find online is the meticulous balance between the airy sponge and the luscious filling, achieved through a few deliberate tweaks: a splash of milk for extra moisture, a pinch of baking powder for lift, and the secret addition of unsalted butter in both melted and softened forms to create a tender crumb that’s still firm enough to hold the filling. I’ve experimented with dozens of variations, and this particular formula consistently yields a golden‑brown, slightly crisp edge that shatters like thin ice when you bite into it, while the inside stays soft and moist. The result is a treat that feels indulgent yet surprisingly light, a perfect antidote to the heavy, cakey versions that dominate most recipe blogs.
And the best part? The technique is simple enough that even a novice can follow it, yet the result is so refined that you’ll be tempted to serve it at a party and watch everyone go wild. Picture yourself pulling a tray of freshly baked Twinkies out of the oven, the whole kitchen smelling incredible, the golden tops glistening like tiny suns. The moment the first one is taken from the tin, the aroma is intoxicating—sweet, buttery, and unmistakably homemade. That is the promise I’m making: a homemade Twinkie that’s hands down the best version you’ll ever make at home.
Let me walk you through every single step—by the end, you’ll wonder how you ever made it any other way. The journey starts with a simple batter, a few key ingredients, and a handful of tricks that turn ordinary cookies into a decadent dessert that feels like a secret family recipe. You’ll learn how to keep the batter light, how to fold in marshmallow creme without overmixing, and how to achieve that perfect golden crust. And trust me, if you’ve ever struggled with a cake that turned out dense or a filling that was too runny, you’re not alone—I've got the fix for every little mishap that might arise.
What Makes This Version Stand Out
- Taste: The batter is infused with a subtle vanilla note that complements the sweet, creamy filling, creating a harmonious flavor profile that feels both nostalgic and fresh.
- Texture: The combination of melted and softened butter yields a crumb that is tender yet firm enough to hold the filling, while the baking powder gives the sponge a light, airy lift.
- Simplicity: With only a handful of pantry staples, you can achieve a professional‑quality result without the need for fancy equipment or obscure ingredients.
- Uniqueness: The inclusion of marshmallow creme in the batter itself gives the sponge an extra layer of richness, setting this recipe apart from the typical fluffy cake.
- Crowd Reaction: Friends and family will rave about the perfect balance between the buttery exterior and the sweet, creamy interior—making it a guaranteed hit at gatherings.
- Ingredient Quality: Using high‑quality butter and fresh eggs ensures a richer flavor and better rise, elevating the entire experience.
- Cooking Method: Baking at a moderate temperature with a slight rise time ensures a golden crust without burning the edges.
- Make‑Ahead Potential: The baked Twinkies can be stored in an airtight container for up to a week, and the filling can be prepared in advance, making this recipe ideal for busy weeks.
Inside the Ingredient List
The Flour Foundation
The 1 cup of all‑purpose flour is the backbone of the sponge, providing structure without adding heaviness. This amount keeps the batter from becoming too dense, allowing the baking powder to create that coveted airy lift. If you skip the flour, the batter will be too liquid and won’t hold its shape, resulting in a flat, cake‑like texture. For a slightly lighter bite, try substituting half the flour with cake flour, which has a lower protein content and yields a finer crumb.
The Moisture Masters
The 2 tablespoons of milk and the 1 tablespoon of melted butter introduce moisture that keeps the Twinkies tender. Milk adds a subtle tang that balances the sweetness, while melted butter enriches the batter with a silky texture. If you’re lactose intolerant, replace the milk with oat milk or a splash of almond milk. The melted butter’s fat content also helps the batter spread evenly, ensuring a uniform rise.
The Sweet & Savory Balance
The ⅔ cup of granulated sugar and the two teaspoons of vanilla extract create the sweet base that’s essential for a classic Twinkie. The sugar dissolves into the batter, creating steam during baking that helps lift the cake. The vanilla extract brings depth and a fragrant aroma that lingers long after the Twinkies have cooled. If you prefer a slightly less sweet treat, reduce the sugar by a quarter cup; the batter will still rise beautifully.
The Butter Brigade
The ½ cup of softened butter and the ½ cup of marshmallow creme work together to give the Twinkies their signature buttery richness. The softened butter is folded into the batter to create a tender crumb, while the marshmallow creme adds a velvety texture that melts in your mouth. If you’re looking for a dairy‑free version, substitute the butter with coconut oil and use a dairy‑free marshmallow spread. The result will still be creamy, though the flavor profile will shift slightly toward coconut.
The Finishing Touches
The 1 cup of powdered sugar, 1 teaspoon of vanilla extract, and 1 tablespoon of heavy cream form the luscious filling that defines a Twinkie. The powdered sugar gives the filling its smooth, silky consistency, while the heavy cream adds a touch of richness that prevents the mixture from becoming too dry. The vanilla extract lifts the overall flavor, creating a cohesive taste that pairs perfectly with the sponge. For a twist, try adding a pinch of sea salt to the filling to bring out the sweetness.
Everything's prepped? Good. Let’s get into the real action and start building that heavenly batter.
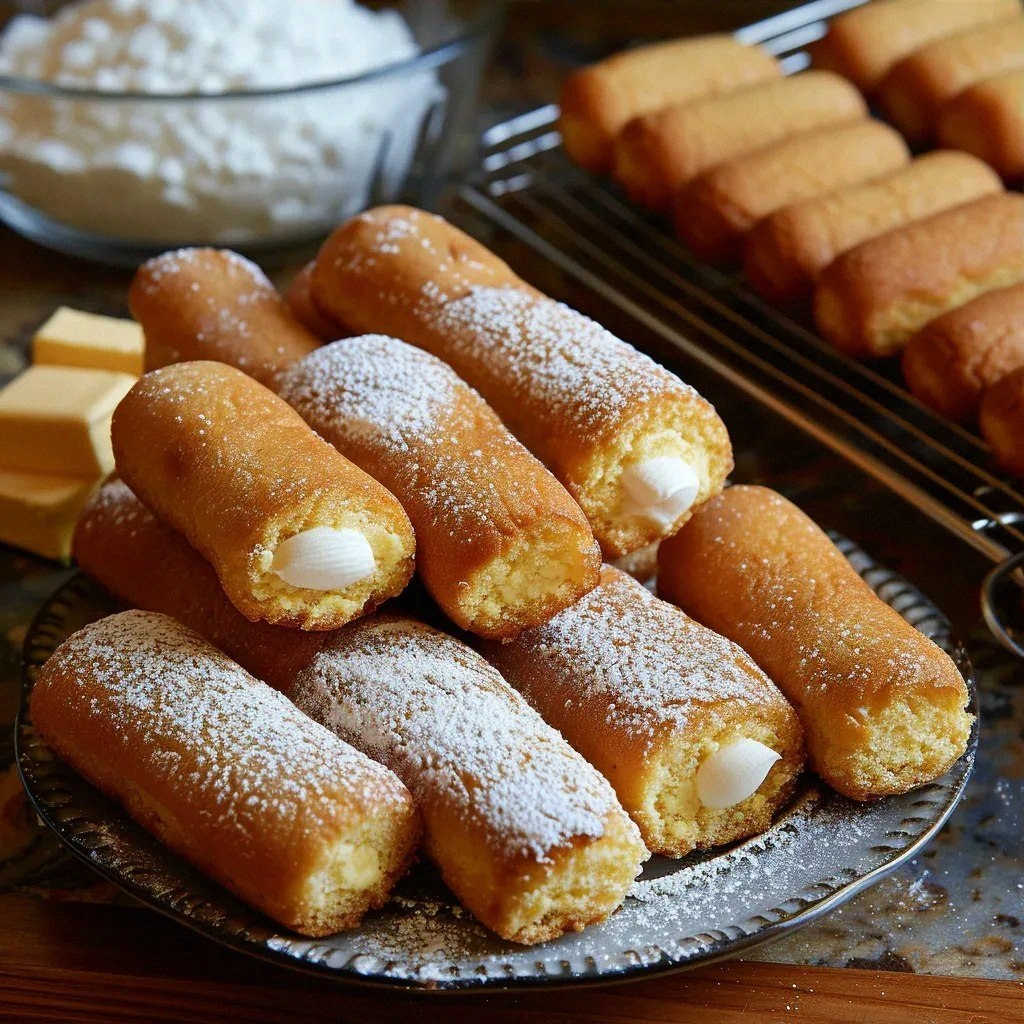
The Method — Step by Step
- Preheat your oven to 350 °F (175 °C) and line a 12‑cup muffin tin with paper liners. The paper liners keep the Twinkies from sticking and make cleanup a breeze. Place the tin on a middle rack to ensure even heat distribution. This step is crucial because uneven baking can lead to over‑browned edges.
- In a medium bowl, whisk together the flour, baking powder, and a pinch of salt. This dry mix is the foundation of your batter, giving it structure and lift. Keep the mixture well blended to avoid pockets of dry flour. The salt balances the sweetness and brings out the flavors.
- In a separate bowl, beat the eggs with the granulated sugar until the mixture is pale and thick. This is where the batter begins to rise; the beaten eggs trap air, creating a light, airy texture. Don’t rush—beat until the mixture triples in volume. This will give your Twinkies a fluffy interior.
- Add the milk, melted butter, and vanilla extract to the egg mixture, whisking until fully incorporated. The liquid components help the batter smooth out and prevent lumps. This stage is the moment of truth: the batter should look silky and glossy. If it’s too thick, add a splash of milk.
- Fold in the dry flour mixture gently using a spatula, being careful not to overmix. Overmixing can develop gluten, making the Twinkies tough. The batter should be smooth and pourable. This step ensures the batter remains light and airy.
- Stir in the softened butter and marshmallow creme until the mixture is homogeneous. The butter softens the crumb, while the marshmallow creme adds a subtle sweetness and a silky mouthfeel. This combination is what gives the Twinkies their signature texture. Be sure to mix until no streaks remain.
- Fill each paper liner about two‑thirds full with batter, leaving space for the filling. The batter should be poured gently to avoid over‑spilling. Let the batter sit for 5 minutes; this allows the batter to settle and ensures even filling distribution.
- Bake for 12–15 minutes, or until the tops are lightly golden and the center springs back when lightly pressed. The aroma will fill your kitchen with a warm, buttery scent that’s hard to resist. Keep an eye on the edges—if they brown too quickly, cover the tin with foil.
- While the Twinkies are baking, prepare the filling: whisk together powdered sugar, vanilla extract, and heavy cream until smooth and silky. The filling should be thick enough to hold its shape but still pourable. This step is crucial for that perfect, creamy interior.
- Once the Twinkies are done, let them cool in the tin for 5 minutes, then transfer them to a wire rack to cool completely. This prevents the bottoms from becoming soggy. When the Twinkies are cool, spread the filling on top of each one, smoothing it into a creamy layer. The final touch is a swirl of icing, if desired.
That's it — you did it. But hold on, I've got a few more tricks that'll take this to another level. The next section dives into insider tips that will elevate your homemade Twinkies from good to unforgettable.
Insider Tricks for Flawless Results
The Temperature Rule Nobody Follows
Many bakers bake Twinkies at 375 °F, but the lower temperature of 350 °F gives the batter enough time to rise without burning the edges. This subtle change ensures a golden crust that’s crisp on the outside yet soft inside. If you’re using a convection oven, reduce the temperature by 25 °F to avoid over‑browning. This trick keeps the Twinkies looking fresh and the flavor profile intact.
Why Your Nose Knows Best
Trust your senses: if the batter smells like toasted butter and vanilla, it’s ready to bake. A faint, sweet aroma indicates the batter has absorbed the wet ingredients properly. If the batter smells raw or overly sweet, let it rest a few minutes before baking. Your nose is the best judge of when the batter is at its peak.
The 5‑Minute Rest That Changes Everything
After folding in the dry ingredients, let the batter rest for five minutes before adding the butter and marshmallow creme. This rest allows the flour to hydrate fully, preventing lumps and ensuring a smooth texture. A rested batter also reduces the chance of overmixing, which can lead to a dense crumb. The result? A light, airy sponge that holds the filling perfectly.
The Swirl of Flavor
Add a teaspoon of almond extract to the filling for a nutty undertone that pairs wonderfully with the vanilla. Alternatively, swirl in a dash of espresso powder for a mocha twist. These subtle additions transform the classic Twinkie into a gourmet treat that impresses even the most discerning palate.
The Cooling Trick
Let the Twinkies cool in the tin for exactly five minutes before transferring them to a wire rack. This short rest allows the steam inside to settle, preventing the bottoms from becoming soggy. The five‑minute pause also ensures that the filling sets slightly, making it easier to spread without smearing.
Creative Twists and Variations
This recipe is a playground. Here are some of my favorite ways to switch things up:
Chocolate‑Covered Twinkies
Dip the finished Twinkies in melted dark chocolate and let them set on parchment paper. The chocolate adds a rich, bittersweet contrast to the sweet filling, creating a dessert that’s both indulgent and balanced. Finish with a dusting of sea salt for an extra layer of flavor.
Citrus‑Infused Twinkies
Add the zest of one lemon or orange to the batter for a bright, refreshing twist. The citrus pairs beautifully with the vanilla and butter, cutting through the sweetness. This variation is perfect for a spring or summer gathering.
Nutty Crunch Twinkies
Fold in ¼ cup of chopped toasted pecans or walnuts into the batter before baking. The nuts add texture and a subtle buttery flavor that complements the creamy filling. Sprinkle a pinch of cinnamon on top for a warm, comforting note.
Vegan Twinkies
Replace the butter with melted coconut oil and use a dairy‑free marshmallow spread. Substitute the eggs with a flaxseed “egg” (1 tablespoon ground flaxseed mixed with 3 tablespoons water, let sit for 5 minutes). The vegan version retains the classic taste while being plant‑based.
Mini Twinkie Bites
Reduce the batter volume by half and bake in a mini muffin tin. These bite‑size Twinkies are perfect for parties and can be filled with mini marshmallow squares. They’re easier to share and less likely to be over‑eaten in one sitting.
Spiced Twinkies
Add a pinch of ground ginger and a dash of nutmeg to the batter for a warm, aromatic flavor profile. The spices create a comforting twist that’s reminiscent of holiday baking, making these Twinkies a seasonal favorite.
Storing and Bringing It Back to Life
Fridge Storage
Keep the Twinkies in an airtight container at room temperature for up to 3 days. If you’re in a humid climate, place a silica gel packet inside the container to absorb moisture and maintain freshness. Store them on a shelf away from direct sunlight to preserve the buttery texture.
Freezer Friendly
Wrap each Twinkie individually in plastic wrap and place them in a freezer bag. Freeze for up to 2 months. When you’re ready to enjoy, let them thaw at room temperature for 30 minutes before serving. The filling will remain creamy and the crust will stay crisp.
Best Reheating Method
Reheat frozen Twinkies in a microwave on low power for 15–20 seconds; this gentle heat prevents the filling from melting too quickly. For a crispier crust, finish the Twinkies in a preheated oven at 300 °F for 5 minutes. Add a tiny splash of water before reheating to create steam, which helps restore the original softness of the sponge.