I was standing in my kitchen on a rainy Tuesday, staring at a half‑baked apple pie that had decided to turn into a soggy mess, when my roommate shouted, “You ever think about tacos for dessert?” I laughed, but the idea lodged itself in my brain like a stubborn caramel drizzle. The next night I was rummaging through the pantry, a bag of flour tortillas, a block of cream cheese, and a couple of crisp apples staring back at me, daring me to create something that would make the world question every culinary rule it ever taught us. I tossed the tortillas into the oven, whisked a cheesecake filling that was smoother than a jazz sax solo, and caramelized the apples until they sang a sweet, buttery lullaby. The result? A dessert that feels like a carnival ride for your taste buds—crispy taco shells hugging a velvety cheesecake filling, topped with caramel‑kissed apples that crunch just enough to keep you guessing.
Picture this: you bite into a warm, lightly browned tortilla that gives a gentle snap, then the creamy interior floods your mouth with a richness that’s balanced by the bright acidity of apples and a whisper of cinnamon. The aroma alone is a full‑on sensory assault—sweet caramel mingling with buttery toast and a hint of vanilla that makes you want to close your eyes and inhale forever. The sound of the tortilla cracking, the glossy shine of the caramel, the buttery scent of the buttered apples—every sense is invited to the party. And the best part? It’s surprisingly simple. No fancy pastry bag, no temperamental gelatin, just pantry staples turned into a show‑stopping masterpiece.
Most recipes for apple cheesecake tacos either overcomplicate the crust, drown the filling in sugar, or forget the crucial step of caramelizing the apples just right. I’ve tried a dozen “quick” versions that left me with soggy shells or a filling that tasted like a grocery store cheesecake. That’s why I’m daring you to taste this and not go back for seconds—because this version nails the texture, the flavor balance, and the visual wow factor in one flawless bite. I’ll be honest — I ate half the batch before anyone else got a chance to try it, and I’m still not over the buttery crunch of the taco shell.
Okay, ready for the game‑changer? I’m about to reveal a secret ingredient that most people skip: a splash of heavy cream folded into the cheesecake mixture at the very end. It gives the filling a silkiness that feels like it’s melting on your tongue, while still holding its shape inside the taco. Let me walk you through every single step — by the end, you’ll wonder how you ever made it any other way.
What Makes This Version Stand Out
- Texture: The tortilla is toasted just enough to be crisp on the outside but remains pliable enough to hold the filling without cracking.
- Flavor Balance: Sweet apples, tangy cream cheese, and a hint of caramel create a harmony that’s neither cloyingly sweet nor overly tart.
- Simplicity: Only ten ingredients, all of which you probably already have, and the steps are straightforward enough for a beginner.
- Uniqueness: Combining a classic taco shell with a cheesecake filling is a twist that surprises guests and sparks conversation.
- Crowd Reaction: People often say “Is this a dessert or a main course?” and then immediately ask for the recipe.
- Ingredient Quality: Using real butter and fresh apples makes a world of difference compared to pre‑made sauces.
- Cooking Method: The two‑stage cooking (toasting the shells, then caramelizing the apples) ensures each component shines.
- Make‑Ahead Potential: You can prep the filling and caramelized apples a day ahead, then assemble just before serving.
Inside the Ingredient List
The Flavor Base
The heart of this dish is the cheesecake filling. Cream cheese provides that luxurious, tangy foundation, while a modest amount of granulated sugar sweetens without overwhelming. Adding a splash of heavy cream at the end transforms the mixture from dense to cloud‑like, making each bite feel like a dream. If you skip the cream, you’ll end up with a filling that’s too stiff to pipe and will crumble inside the taco.
The Texture Crew
Flour tortillas act as the taco shell, but you can also use mini corn tortillas for a gluten‑free twist. The key is to toast them just enough to create a golden crust that still bends. Butter is brushed on after toasting; this not only adds flavor but also creates a barrier that prevents the filling from soaking in and making the shell soggy. If you forget the butter, the tacos will feel dry and the filling will leak.
The Unexpected Star
Caramelized apples are the surprise hero. The combination of brown sugar, cinnamon, and a pinch of nutmeg creates a warm, aromatic glaze that coats each apple slice like a glossy varnish. The butter in the pan helps achieve that perfect caramelization without burning. If you use tart apples like Granny Smith, the contrast will be sharper; for a sweeter profile, opt for Fuji or Honeycrisp.
The Final Flourish
A drizzle of caramel sauce and a dusting of powdered sugar finish the tacos with a glossy sheen and a hint of extra sweetness. The caramel adds a buttery depth that pairs perfectly with the tang of the cream cheese, while the powdered sugar provides a visual sparkle that makes the dish look as good as it tastes. If you’re watching sugar, you can swap the powdered sugar for a light dusting of cinnamon.
Everything's prepped? Good. Let's get into the real action...
The Method — Step by Step
Preheat your oven to 350°F (175°C). While the oven warms, line a baking sheet with parchment paper. Lay out the eight small flour tortillas in a single layer, making sure they don’t overlap. Brush each tortilla lightly with melted butter on both sides; this is the secret that keeps them pliable and flavorful. Place the tray in the oven for exactly 5 minutes, or until the edges start to turn a light golden brown and you hear a faint sizzle. Power transition: This is the moment where the taco shell becomes a crunchy canvas for the filling.
While the tortillas toast, start the cheesecake filling. In a large mixing bowl, beat 2 cups of softened cream cheese until smooth and free of lumps. Add ½ cup granulated sugar and continue beating until the mixture lightens in color. Crack in the two large eggs, one at a time, beating just until incorporated—over‑mixing will introduce too much air, which can cause the filling to crack later. Stir in 1 tsp vanilla extract and the splash of 1 cup heavy cream, folding gently until the batter is silky. Watch Out: If the batter looks grainy, you’ve probably over‑mixed; let it sit for a minute, then give it a quick whisk to smooth it out.
Now, move on to the apples. Peel, core, and dice two medium apples into bite‑size cubes. Melt 2 tbsp unsalted butter in a large skillet over medium heat. Once the butter foams, sprinkle ¼ cup brown sugar, 1 tsp ground cinnamon, and ¼ tsp ground nutmeg into the pan. Stir quickly to combine, then add the apple cubes. Cook, stirring occasionally, for about 6‑8 minutes, or until the apples are tender and the sauce has thickened to a glossy glaze. The scent at this point is pure autumn in a pan, even if it’s midsummer outside.
When the tortillas are toasted, remove them from the oven and let them cool for a minute—just enough that they’re warm but not scorching. Using a spoon, carefully pipe or dollop about ¼ cup of the cheesecake mixture onto the center of each tortilla, spreading it gently toward the edges but leaving a small border. This border prevents the filling from spilling over when you fold the taco.
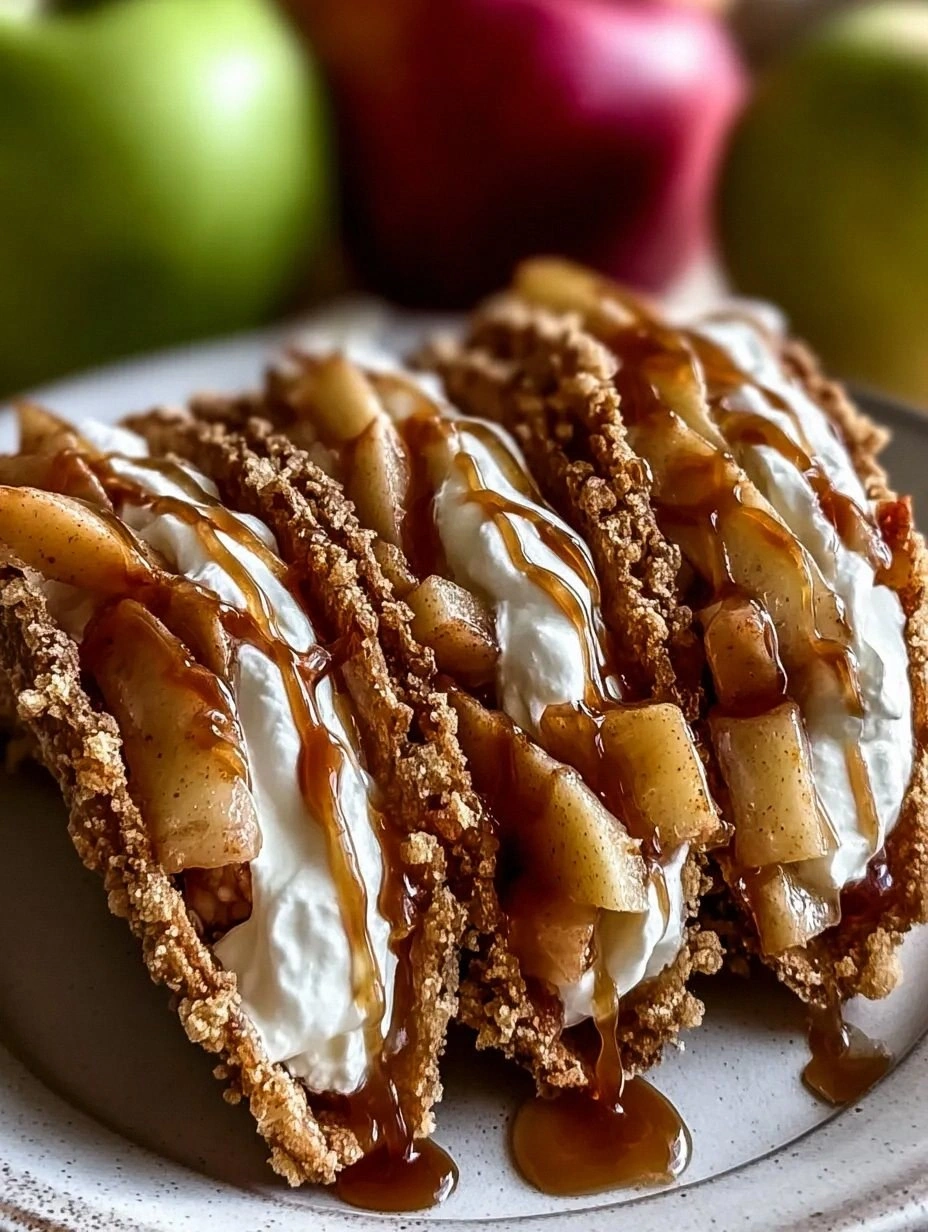
Fold each tortilla in half, creating a taco shape, and place them seam‑side down on the same parchment‑lined sheet. Spoon a generous amount of the caramelized apples over the top of each taco, letting a few pieces peek out for visual appeal. Drizzle ¼ cup caramel sauce over the assembled tacos, allowing it to pool slightly in the center. If you’re feeling extra indulgent, sprinkle a light dusting of powdered sugar now; it will melt slightly into the warm caramel, creating a glossy finish.
Return the assembled tacos to the oven for a final 3‑4 minutes. This brief bake sets the cheesecake filling just enough so it holds its shape while keeping the interior luxuriously soft. You’ll know they’re ready when the edges of the tortilla turn a deeper golden hue and the caramel sauce begins to bubble gently. Remove from the oven and let them sit for two minutes—this short rest lets the flavors meld together.
Plate the tacos on a serving platter. For a dramatic presentation, stand them upright in a shallow bowl of crushed graham cracker crumbs or toasted coconut flakes; this adds a subtle crunch and a visual contrast. Garnish with a few fresh mint leaves for a pop of color and a hint of freshness that cuts through the richness. Serve warm, and watch your guests dive in without hesitation. And now the fun part: The first bite is pure magic, the buttery shell giving way to a velvety cheesecake, then a burst of caramel‑kissed apple. I dare you to taste this and not go back for seconds.
That's it — you did it. But hold on, I've got a few more tricks that'll take this to another level...
Insider Tricks for Flawless Results
The Temperature Rule Nobody Follows
Never let your cream cheese sit straight out of the fridge for more than 30 minutes before mixing. If it’s too warm, the batter will become runny; too cold, and you’ll end up with lumps that never fully dissolve. The sweet spot is a soft, pliable texture that yields to a whisk but holds its shape. I once tried to speed things up by microwaving the cream cheese for 10 seconds—let’s just say the result was a grainy disaster that ruined the whole batch.
Why Your Nose Knows Best
When caramelizing the apples, trust your sense of smell more than the clock. The moment you detect a buttery, nutty aroma, you’re at the perfect caramelization point. If you wait too long, the sugars will darken and turn bitter; too short and you’ll miss the deep flavor. I’ve found that a quick sniff is the most reliable indicator, especially if your stove runs hotter than usual.
The 5‑Minute Rest That Changes Everything
After you finish the final oven bake, let the tacos rest for exactly five minutes before serving. This pause allows the cheesecake to set just enough that it won’t ooze out when you bite, while the caramel remains glossy. Skipping this step is the most common reason people end up with a mess on their plates. Trust me, those five minutes are worth the anticipation.
Butter Brush Technique
When brushing the tortillas with butter, use a silicone pastry brush and apply a thin, even coat. Too much butter makes the shell soggy; too little leaves it dry and prone to cracking. A tip: melt the butter with a pinch of salt and a splash of olive oil—this combination gives a richer flavor and a slightly higher smoke point, ensuring a perfect toast.
Caramel Sauce Consistency Check
When you drizzle the caramel sauce, it should be thick enough to coat a spoon but still fluid enough to flow into the taco’s crevices. Test it by dipping a spoon; if the sauce coats the back of the spoon without running off instantly, you’ve nailed the consistency. Adding a teaspoon of heavy cream at the end of the caramelization process can rescue a sauce that’s become too thick.
Serving Temperature Matters
Serve the tacos warm, but not piping hot. If they’re too hot, the cheese can melt out of the tortilla; if they’re too cold, the crust loses its crunch. Aim for a serving temperature of around 130°F (54°C). I’ve found that letting the assembled tacos sit on a warm plate for a minute brings them to the perfect temperature.
Creative Twists and Variations
This recipe is a playground. Here are some of my favorite ways to switch things up:
Chocolate‑Swirl Cheesecake Tacos
Add 2 tbsp melted dark chocolate to the cheesecake batter before folding in the cream. The result is a decadent chocolate‑cheese swirl that pairs beautifully with the caramelized apples. Top with a drizzle of chocolate ganache instead of caramel for an extra indulgent finish.
Berry Burst Variation
Swap the apples for a mix of fresh berries—blueberries, raspberries, and sliced strawberries. Toss the berries with a little lemon zest and a pinch of sugar, then caramelize quickly. The tartness of the berries cuts through the richness of the cheesecake, offering a lighter, summery vibe.
Spiced Pumpkin Taco
Perfect for fall, replace the apples with canned pumpkin puree mixed with brown sugar, cinnamon, ginger, and a dash of cloves. Use a pumpkin‑spiced caramel sauce and garnish with toasted pepitas for crunch. This version turns the dish into a seasonal showstopper.
Savory Cheese Taco
For a sweet‑and‑savory twist, add a pinch of smoked paprika to the cream cheese mixture and replace the caramel sauce with a thin drizzle of balsamic reduction. Top with thinly sliced prosciutto and a few arugula leaves. The peppery notes and salty prosciutto create a sophisticated flavor profile.
Gluten‑Free Corn Taco
Swap the flour tortillas for small corn tortillas and ensure the graham cracker crumbs (if you choose to use them for garnish) are gluten‑free. The natural corn flavor adds a rustic edge, and the tacos stay crisp when toasted correctly.
Storing and Bringing It Back to Life
Fridge Storage
If you need to store leftovers, keep the components separate. Place the toasted tortillas in an airtight container, the cheesecake filling in a sealed bowl, and the caramelized apples in another container. They’ll stay fresh for up to 3 days. When ready to serve, re‑assemble and give the tacos a quick 30‑second warm‑up in a skillet.
Freezer Friendly
Both the cheesecake filling and the caramelized apples freeze beautifully. Portion the filling into freezer‑safe bags, label with the date, and store for up to 2 months. The apples can be frozen on a parchment sheet, then transferred to a zip‑top bag. Thaw in the refrigerator overnight, then re‑heat gently before assembling.
Best Reheating Method
To revive the tacos, place them on a baking sheet, add a tiny splash (about a teaspoon) of water to the bottom of the sheet, and cover loosely with foil. Heat in a 300°F (150°C) oven for 8‑10 minutes. The water creates steam that restores the tortilla’s flexibility while keeping the filling moist. Avoid microwaving; it makes the tortilla rubbery and the filling grainy.