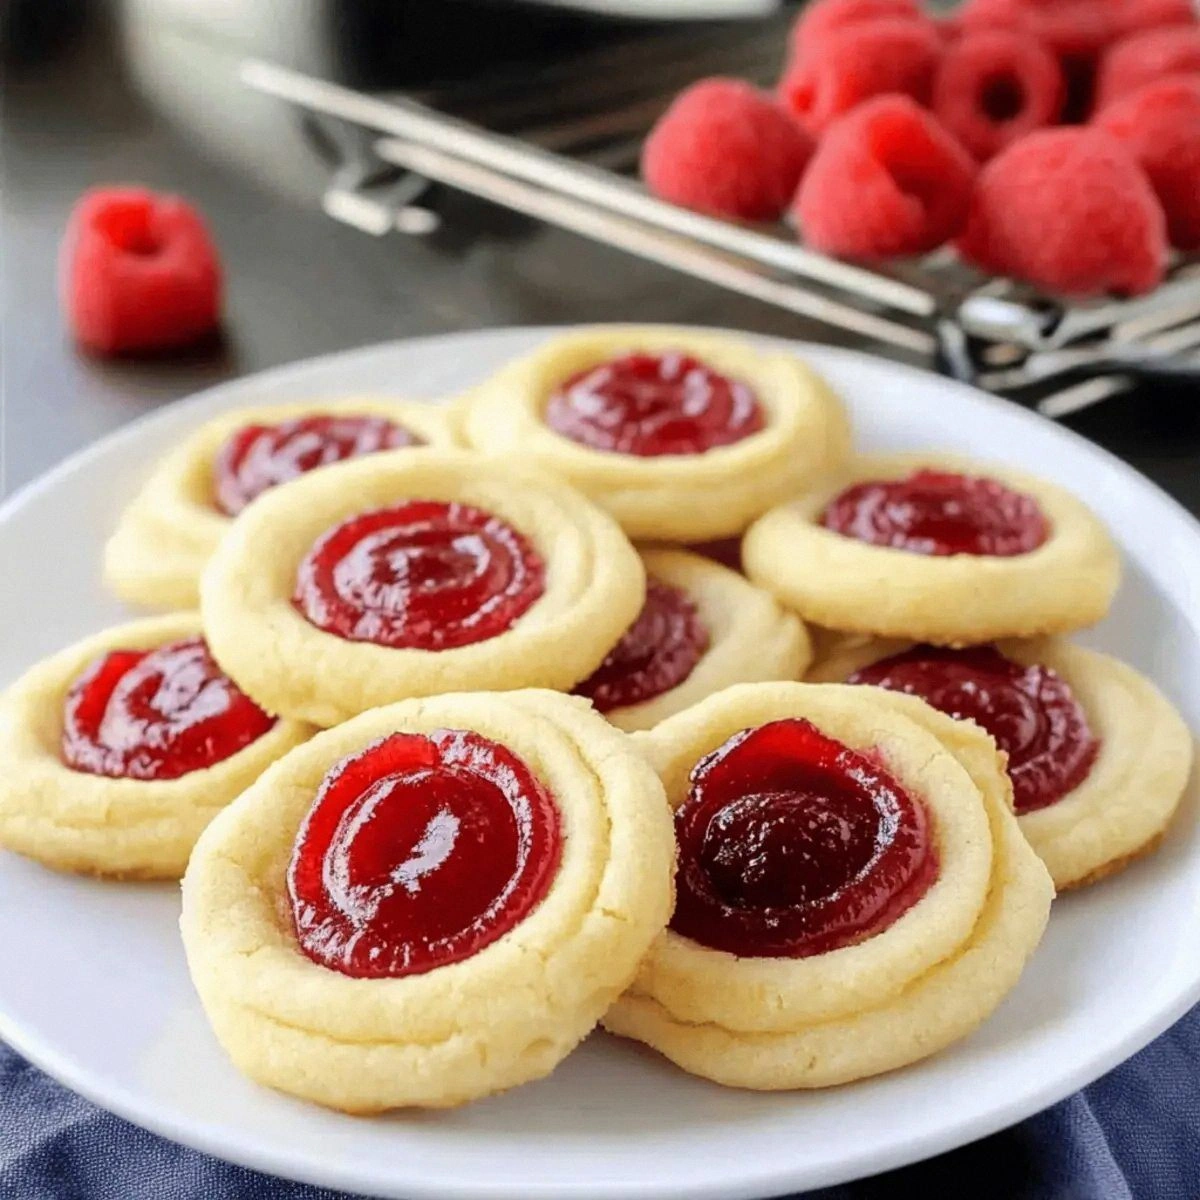
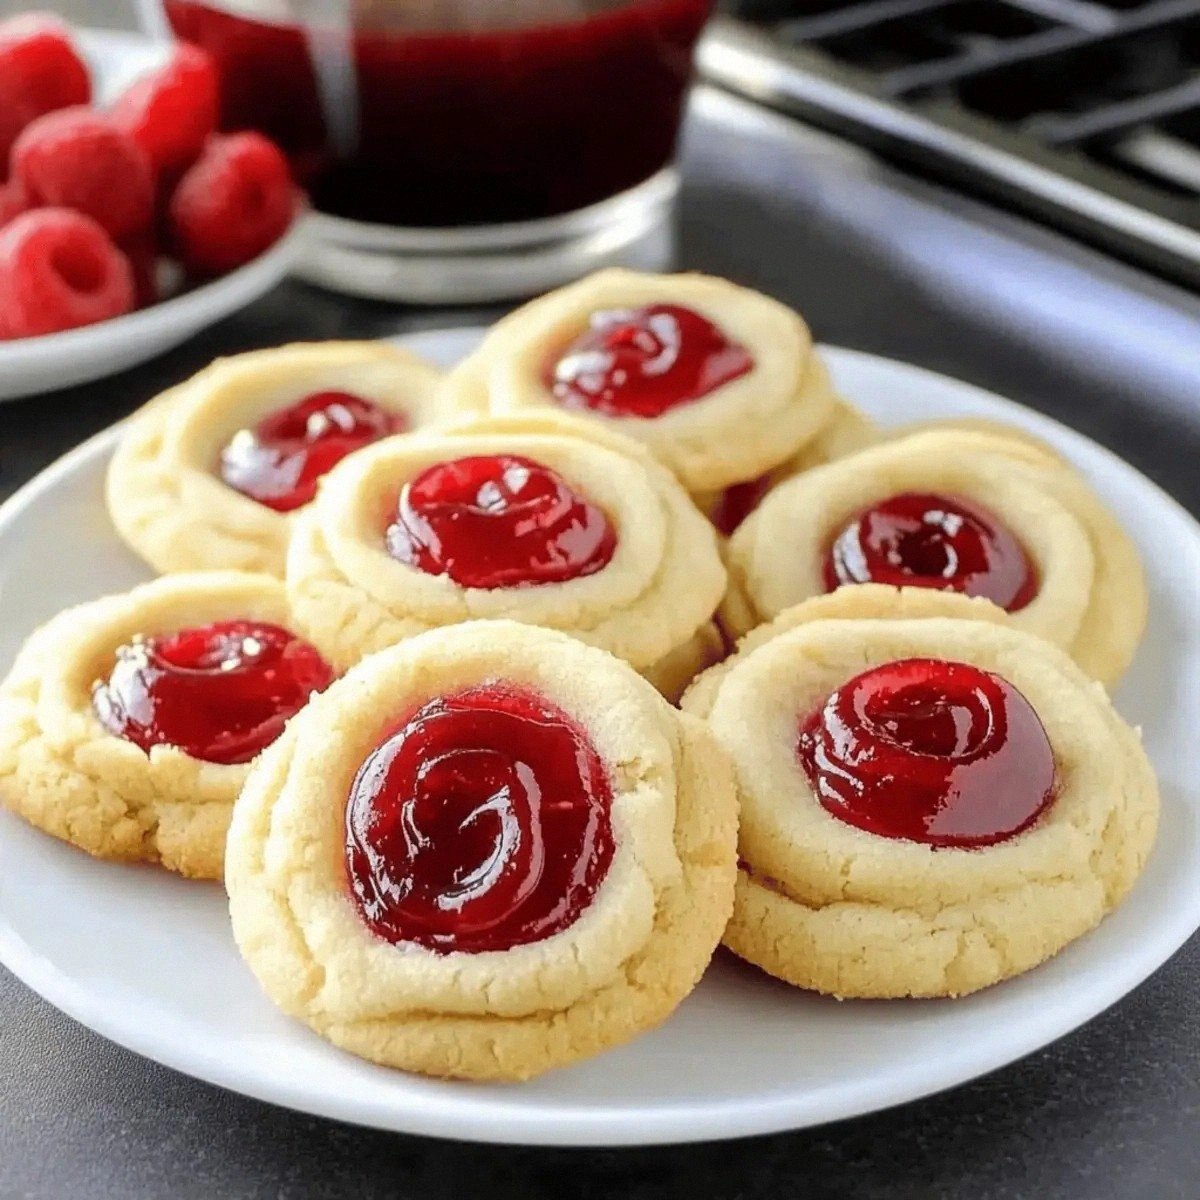
Picture this: it’s a rainy Saturday afternoon, the kind that makes you want to crawl under a blanket with a steaming mug and something sweet to melt the gloom. I was halfway through a marathon of binge‑watching my favorite sitcom when a sudden craving hit me like a bolt of lightning—something buttery, something bright, something that would make the whole house smell like a spring garden. I raided the pantry, grabbed the lone stick of butter, a jar of raspberry jam that was practically begging to be used, and set out on a culinary quest that would end with a batch of cookies so addictive they could practically be called “edible hugs.”
The kitchen quickly turned into a battlefield of aromas: the warm, nutty scent of butter melting in the pan, the sharp, sugary snap of sugar crystals hitting the bowl, and the faint, floral perfume of vanilla dancing in the air. My ears were filled with the gentle hum of the mixer, the soft thud of the wooden spoon against the side of the bowl, and the occasional pop of a stray bubble escaping the batter. I could feel the cool metal of the mixing bowl under my fingertips, the smooth glide of the spatula, and the slight resistance of the dough as it came together—each tactile cue promising a perfect texture. The moment I spooned the first dollop of jam onto a cookie, I knew I was onto something extraordinary.
Most raspberry butter cookie recipes out there either drown the delicate berry flavor in a sea of sugar, or they end up dry and crumbly, like sand that refuses to hold together. I’ve tried a dozen variations, and most of them get this completely wrong. This version, however, is the result of a stubborn trial‑and‑error process where I finally cracked the code: a buttery base that stays melt‑in‑your‑mouth soft, a jam center that bursts with fresh raspberry zing, and a subtle vanilla whisper that ties everything together. The secret? A precise balance of fat and flour, plus a technique that locks in moisture without making the cookies spread into a flat, lifeless disc.
But I’m not stopping at just the perfect texture. I’m about to reveal a little twist that most bakers overlook—a quick chill of the dough that turns the edges into a delicate, caramelized crust while keeping the centers chewy and jam‑filled. I dare you to taste this and not go back for seconds. Let me walk you through every single step — by the end, you’ll wonder how you ever made it any other way.
What Makes This Version Stand Out
- Flavor: The raspberry jam is the star, but it’s the buttery canvas that lets the fruit shine without being overpowered.
- Texture: A crisp edge that shatters like thin ice meets a soft, melt‑in‑your‑mouth center that practically sighs when you bite.
- Simplicity: Only seven core ingredients, yet each one plays a pivotal role—no fancy gadgets or obscure spices required.
- Uniqueness: The jam is folded in after the dough rests, creating a hidden pocket that bursts open only when you bite.
- Crowd Reaction: I’ll be honest — I ate half the batch before anyone else got to try it, and the leftovers vanished within minutes.
- Ingredient Quality: Using real butter (not margarine) and seedless jam makes the difference between “good” and “jaw‑dropping.”
- Method: A short chill period that locks in moisture, preventing the dreaded flat cookie disaster.
- Make‑Ahead Potential: These cookies keep their texture for days, making them perfect for prep‑ahead snack packs.
Inside the Ingredient List
The Flavor Base
Butter (1 cup): The backbone of any great cookie, butter provides richness and that melt‑in‑your‑mouth feel. Use unsalted, high‑fat butter and let it soften at room temperature; if it’s too cold, you’ll end up with a gritty texture. Skipping butter for oil will make the cookies greasy rather than buttery, and the jam won’t adhere as nicely. If you’re dairy‑free, try a high‑quality coconut oil, but expect a subtle coconut note to sneak in.
Granulated Sugar (3/4 cup): Sugar not only sweetens but also contributes to the cookie’s tender crumb. The right amount balances the tartness of the raspberry jam. Reducing it will make the jam taste sharper, while adding more can cause the cookies to spread too much. For a deeper caramel flavor, swap half the white sugar for light brown sugar.
The Texture Crew
All‑Purpose Flour (2 cups): Flour gives structure. Too much and the cookies become cakey; too little and they crumble. Measure by spooning flour into the cup and leveling it off—no packing. If you’re gluten‑sensitive, a 1:1 gluten‑free blend works, but the texture will be slightly softer.
Baking Powder (1 tsp): This leavening agent provides a subtle lift, ensuring the cookies are not dense. Over‑baking with too much will make them rise then collapse, creating a dry crumb. If you run out, a pinch of baking soda plus a tiny splash of lemon juice can mimic the effect.
The Unexpected Star
Seedless Raspberry Jam (1/2 cup): The jam is the surprise center that delivers a burst of fresh fruit flavor. Using seedless jam prevents unwanted crunch and keeps the texture silky. If you prefer a tangier bite, opt for a raspberry‑chili jam, but be ready for a flavor curveball. Fresh frozen raspberries blended with a touch of honey make an excellent homemade alternative.
The Final Flourish
Egg (1 piece): The egg acts as a binder, holding the dough together while adding a slight richness. Over‑beating can incorporate too much air, leading to puffier cookies. If you’re vegan, a flax egg (1 tbsp ground flaxseed + 3 tbsp water) works, though the texture will be a tad denser.
Pure Vanilla Extract (1 tsp): Vanilla adds depth, rounding out the sharpness of the jam. A splash of almond extract can replace half of the vanilla for a nutty twist, but be careful not to overpower the raspberry.
Everything's prepped? Good. Let's get into the real action...
The Method — Step by Step
Start by preheating your oven to 350°F (175°C). While the oven warms up, line two baking sheets with parchment paper; this prevents sticking and gives you a clean release. I dare you to watch the oven’s glow and feel the anticipation building—this is the moment where the magic truly begins.
In a large mixing bowl, cream the softened butter with the granulated sugar until the mixture is pale, fluffy, and smells like a bakery on a Sunday morning. Use a handheld mixer on medium speed; the texture should be smooth, not grainy. Power transition: Okay, ready for the game‑changer? Add the egg and vanilla extract, beating just until incorporated. You’ll notice the batter become silkier, a sign that the emulsion is perfect.
Now, whisk together the flour and baking powder in a separate bowl. This step ensures even distribution of the leavening agent, preventing pockets of rise.
Kitchen Hack: Sift the flour and baking powder together over the butter mixture; it aerates the flour and makes the dough lighter.Gradually fold the dry ingredients into the wet mixture, using a spatula and a gentle hand. Scrape the sides, turn the bowl, and keep the motion smooth. The dough should come together in a cohesive ball that doesn’t stick to your fingers. If it feels too dry, add a teaspoon of cold milk; if too wet, sprinkle a little extra flour—just a pinch.
Here’s the secret: once the dough is formed, gently press it into a flat disc about 1‑inch thick, wrap it tightly in plastic wrap, and chill in the refrigerator for exactly 30 minutes.
This chilling locks the butter in place, ensuring those coveted crisp edges.Watch Out: Skipping this chill step will cause the cookies to spread too much, resulting in thin, crispy discs rather than buttery rounds.While the dough chills, prepare the jam centers. Scoop out a teaspoon of seedless raspberry jam onto a small piece of parchment and set aside. If you want a heart‑shaped surprise, roll the jam into tiny balls and flatten them slightly—this will create a pocket that stays hidden until the bite.
After the chill, portion the dough onto a lightly floured surface. Roll each piece into a 3‑inch ball, then press a small indentation in the center with your thumb. Drop a teaspoon of jam into the indentation and gently seal the dough around it, rolling it back into a smooth ball. The jam should be completely encased, like a secret treasure.
Place the jam‑filled balls onto the prepared baking sheets, spacing them about 2 inches apart. Lightly press each ball down to a thickness of about ½ inch—this gives the cookies a uniform shape and ensures even baking.
Kitchen Hack: Sprinkle a pinch of sea salt on top before baking to accentuate the raspberry’s sweetness.Slide the sheet into the preheated oven and bake for 12‑14 minutes, or until the edges turn a light golden brown and you can see the tops start to firm. The aroma should fill your kitchen with buttery, fruity notes that make you want to dance. When you tilt the tray, the cookies should have a slight give, not a wobble. Remove from the oven and let them cool on the sheet for 2 minutes before transferring to a wire rack.
That's it — you did it. But hold on, I've got a few more tricks that'll take this to another level...
Insider Tricks for Flawless Results
The Temperature Rule Nobody Follows
Never, ever bake these cookies straight from a warm kitchen. If your butter is even slightly warm, the cookies will spread too quickly. Keep the butter at a cool room temperature (around 68°F) and chill the dough as instructed. This rule alone can turn a mediocre batch into a bakery‑worthy masterpiece.
Why Your Nose Knows Best
When the cookies are about 10 minutes into baking, pause and sniff the kitchen. If you detect a nutty, caramel‑like scent, you’re on the right track. If the aroma is still raw butter, give them another minute. Trusting your senses beats any timer.
The 5‑Minute Rest That Changes Everything
After transferring the cookies to the wire rack, let them sit undisturbed for at least five minutes. This short rest allows the interior to finish setting, preventing the jam from oozing out when you bite. I once cut into a cookie too early and the jam spilled everywhere—lesson learned.
Silky Finish with a Brush
For a glossy top, lightly brush the cookies with a tiny bit of melted butter right after they come out of the oven. This adds a subtle sheen and a hint of extra buttery flavor that makes the cookies look as good as they taste.
Freezing for Future Feasts
These cookies freeze beautifully. After they’ve cooled completely, arrange them in a single layer on a baking sheet and freeze for 30 minutes, then transfer to a zip‑top bag. When you’re ready to serve, pop them in a 300°F oven for 5 minutes—fresh out of the freezer and ready to wow.
Creative Twists and Variations
This recipe is a playground. Here are some of my favorite ways to switch things up:
Lemon Zest Burst
Swap half the raspberry jam for lemon curd and add a teaspoon of finely grated lemon zest to the dough. The bright citrus cuts through the butter, creating a summer‑ready cookie that’s both tart and sweet.
Chocolate Swirl
Fold in ¼ cup of dark chocolate chips into the dough before chilling, and replace the raspberry jam with a chocolate hazelnut spread. The result is a decadent, almost brownie‑like cookie with a buttery crust.
Almond Joy
Replace the vanilla extract with almond extract and stir in ¼ cup of toasted sliced almonds. The nutty crunch pairs beautifully with the jam, giving you a sophisticated flavor profile.
Spiced Autumn
Introduce a pinch of ground cinnamon and a dash of nutmeg to the flour mixture, and use a pumpkin‑spice infused raspberry jam. Perfect for those crisp fall evenings when you need a warm, comforting treat.
Mini Bite‑Size
Form the dough into bite‑size pearls, press a tiny dollop of jam in the center, and bake for 8‑10 minutes. These mini versions are ideal for cocktail parties or as a garnish for ice cream.
Vegan Version
Swap butter for coconut oil, use a flax egg, and choose a plant‑based raspberry jam. The texture will be slightly softer, but the flavor remains vibrant. Serve with a drizzle of maple syrup for an extra touch.
Storing and Bringing It Back to Life
Fridge Storage
Place the cooled cookies in an airtight container lined with parchment paper. They’ll stay fresh for up to five days. A tiny slice of bread placed on the top layer helps maintain moisture, keeping the cookies soft.
Freezer Friendly
Arrange cookies in a single layer on a tray, freeze for 30 minutes, then transfer to a zip‑top freezer bag. They’ll keep for up to three months. When you’re ready to enjoy, let them thaw at room temperature for 10 minutes, then give them a quick 3‑minute warm‑up in a 300°F oven.
Best Reheating Method
To revive that buttery crunch, preheat your oven to 300°F, place the cookies on a parchment‑lined tray, and bake for 4‑5 minutes. Add a tiny splash of water (about a teaspoon) to the tray before heating; the steam revives the interior without drying it out.