I still remember the day my kitchen nearly exploded with banana bread ambition. There I stood, three overripe bananas mocking me from the counter, a jar of peanut butter winking from the pantry, and a chocolate craving so fierce it could power a small city. The mission sounded simple: whip up a quick banana bread. Instead, my stand mixer revolted, the loaf pan mysteriously vanished, and I ended up with a batter so thick it could double as spackle. In pure desperation—and maybe a little spite—I scraped the whole mess onto a sheet pan, showered it with dark chocolate chunks, and shoved it in the oven while muttering words not suitable for polite company. What emerged twenty-five minutes later wasn’t just a Plan B; it was a chewy, fudgy, protein-packed revelation that tasted like someone had smashed banana bread, a candy bar, and a power bar into one glorious square. I ate three pieces before they even cooled, burned my tongue, and still went back for a fourth. If you’ve ever needed a grab-and-go breakfast that feels like dessert, a pre-workout bite that doesn’t taste like cardboard, or an afternoon pick-me-up that won’t send you on a sugar roller coaster, you’re about to meet your new best friend.
These bars walk into a room like they own the place: the aroma of roasted bananas and peanut butter swirls through the air, dark chocolate melts into glossy puddles, and the edges caramelize into the kind of chewy shards that make you close your eyes and sigh. They’re soft enough to feel like banana bread, sturdy enough to toss into a gym bag, and loaded with enough natural fuel to power you through a morning commute, a ten-mile hike, or a toddler birthday party without the cake crash. And here’s the kicker—there’s no mixer, no waiting for butter to soften, no finicky folding. If you can mash a banana and stir with a fork, you’re officially qualified. I dare you to taste one warm and not immediately plan the next batch.
Most “healthy” bars taste like someone punished a raisin. Not these. We’re using ultra-dark chocolate for antioxidants, peanut butter for long-burning fats, bananas for natural sweetness and potassium, and a sneaky scoop of oats for fiber that keeps you full longer than your average cup of coffee. Picture yourself pulling the pan from the oven, the chocolate still molten, the scent so intoxicating the neighbor’s cat tries to move in. You slice a square, the knife glides through like warm brownie batter, and the first bite hits you: deep cocoa, silky peanut butter, mellow banana, and that toasty oat backbone. You’ll blink, look down at the pan, and realize half of it has somehow disappeared. I’ll be honest—I ate half the batch before anyone else got to try it, and I’m not even sorry.
Let me walk you through every single step—by the end, you’ll wonder how you ever made it any other way.
What Makes This Version Stand Out
- One-Bowl Wonder: You literally stir everything with a fork in the same bowl you mash the bananas in. Translation: only one dish to wash, which means you can’t use the “but cleanup is annoying” excuse anymore.
- Bakery-Level Chew: The combo of oat flour and a quick blast of heat gives you that brownie-edge chew without drying out the center—think energy bar meets banana bread meets chocolate cookie.
- Protein Without Powder: We’re using peanut butter and eggs for a natural 8 g of protein per square. No chalky aftertaste, no weird fake sugar funk, just real food that keeps you satisfied.
- Freezer Heroes: Wrap them individually, freeze for up to three months, then pop one into a lunchbox or microwave for thirty seconds—boom, instant healthy dessert that tastes fresh-baked.
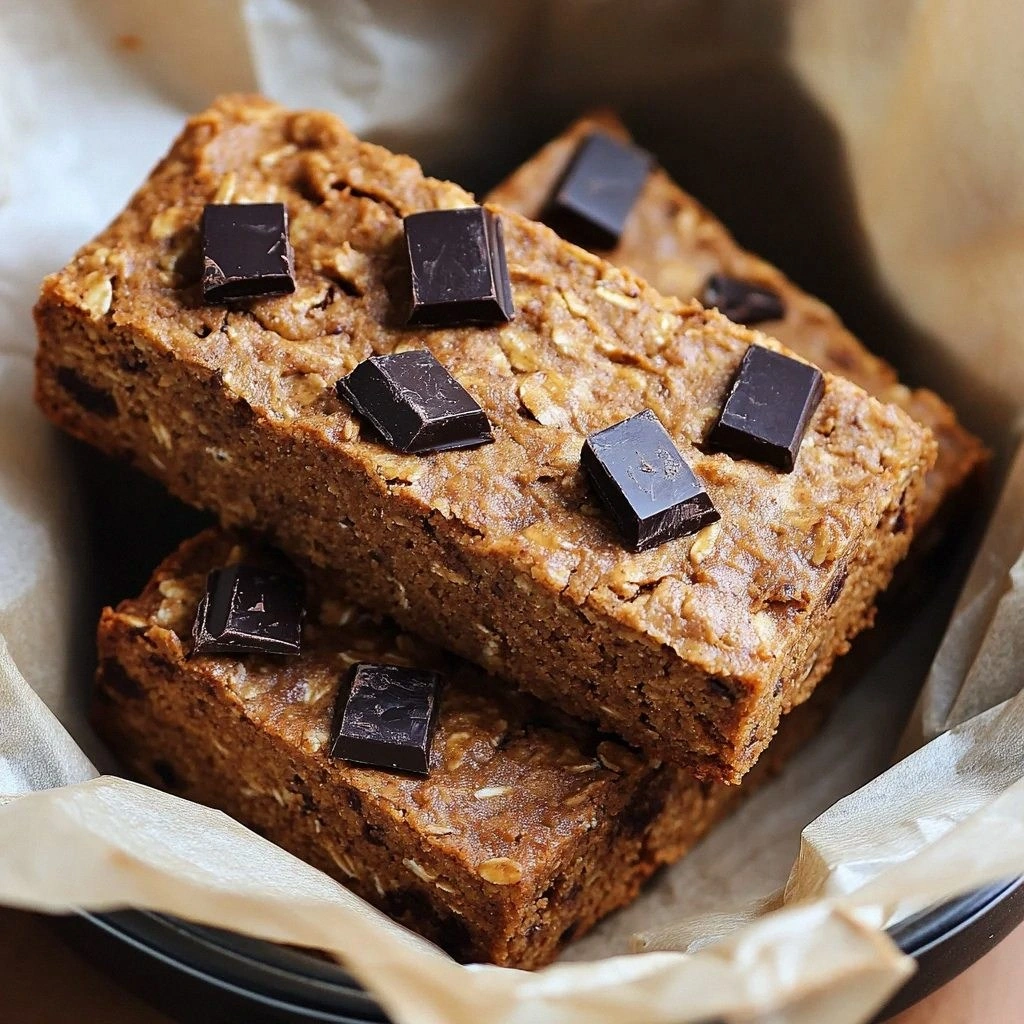
- Chocolate That Actually Melts: We fold in chopped 70 % cacao chocolate so you get melty pockets, not waxy chips. When warm, it’s like lava cake; when cold, it snaps like a candy bar.
- Scent That Sells Houses: Realtors should bake these before an open house. The smell of roasted banana, toasted oats, and cocoa drifting through the air is pure domestic heaven.
- Breakfast Disguised as Treat: Oats, banana, eggs, peanut butter—basically a smoothie in bar form, but your brain thinks you’re eating cake. Win-win.
- Gluten-Free Without Tears: Use certified gluten-free oats and you’re golden. No weird gums, no pricey flour blends, no crumbly hockey-puck texture.
Alright, let’s break down exactly what goes into this masterpiece...
Inside the Ingredient List
The Flavor Base
Bananas are the soul of these bars. You want them so spotty they look like a dalmatian—black skins mean maximum natural sugar and that unmistakable banana bread perfume. Mash them until they’re almost pourable; lumps bigger than a pea will sink and create wet pockets. If you only have yellow bananas, the hack above will save you, but nothing beats the depth of a fruit that’s been hanging on the hook long enough to feel embarrassed about its age.
Peanut butter is the velvety backbeat. Go for natural, no-added-sugar stuff that separates into oil and paste. Stir it well so you’re not dumping a quarter cup of oil into the bowl and leaving the concrete-solid bottom for tomorrow’s toast. The salt level should taste like a beach breeze, not like you’re licking a rock—if your PB is unsalted, add a pinch more to the batter.
The Texture Crew
Oat flour sounds fancy, but it’s just rolled oats blitzed in a blender for thirty seconds. It soaks up moisture like a sponge, giving the bars structure without the dryness of wheat flour. If you skip it, you’ll bake a rubbery banana pancake that bends like a yoga mat. Quick oats work in a pinch, but the finer grind of homemade oat flour keeps things tender.
Eggs are the silent binding heroes. They set the bars just enough to slice cleanly while keeping the center fudgy. Vegan? Swap in two flax eggs (2 tablespoons ground flax + 5 tablespoons water, sit five minutes) and reduce the oven temp by 25 °F so they don’t taste like cafeteria cardboard.
The Unexpected Star
Dark cocoa powder is the stealth depth charge. A mere two tablespoons bloom in the oven, amplifying the chocolate chunks and giving the bars a haunting richness. Dutch-processed is smoother, natural is more bitter—pick your fighter, but don’t skip it unless you want glorified banana oatmeal.
The Final Flourish
Chop your own dark chocolate bar instead of using chips. Chips are engineered to keep their shape, which means they won’t melt into glossy rivers. A rough chop gives you shards that melt, puddles that crack, and tiny flecks that freckle every bite. Splurge on 70 % cacao or higher; the slight bitterness balances the banana sweetness like a tightrope walker.
Everything’s prepped? Good. Let’s get into the real action...
The Method — Step by Step
- Preheat your oven to 350 °F (175 °C). Line an 8-inch square pan with parchment paper so the sling hangs over two sides like sad puppy ears—this lets you lift the bars out without wrestling a spatula and leaving half of them behind. Lightly grease the exposed sides with a smear of coconut oil or neutral spray so the edges don’t grip like stubborn Velcro.
- In a large bowl, mash the bananas with a fork until they look like baby food with trust issues—smooth but still carrying a few emotional lumps. You need one packed cup; if your bananas are small, use three, if they’re XL, two might suffice. The mash should glisten like it’s been crying sweet banana tears, because those natural sugars are about to caramelize into chewy edges.
- Whisk in the peanut butter, eggs, and vanilla until the mixture resembles glossy brownie batter that’s been hitting the gym—thick, shiny, and slightly ribbony. Take a moment to inhale; it smells like the cafeteria of your childhood dreams if your school had been run by pastry chefs. Don’t worry if the peanut butter seizes into tiny clumps; they’ll melt into molten swirls in the oven.
- Sprinkle in the oat flour, cocoa powder, baking soda, and salt. Switch to a spatula and fold just until the dry bits disappear. The batter will look like chocolate pudding that’s been left in the sun—loose but not runny. Over-mixing activates the oats and turns your bars into rubber, so channel zen master energy and stop when you still see a faint streak or two of flour.
- Fold in two-thirds of the chopped chocolate. The warmth of the batter will start melting the smaller shards, creating chocolate freckles throughout. Reserve the remaining chunks for the top so you get dramatic puddles that glisten like dark lakes on a moonlit night. Give the bowl a quarter-turn and admire your handiwork—you’re about five minutes away from greatness.
- Scrape the batter into the lined pan and spread it into an even layer. The batter is thick, so use an offset spatula or the back of a spoon dipped in water to coax it into the corners without tearing the parchment. Sprinkle the remaining chocolate on top and gently press so the chunks adhere; otherwise they’ll roll off like rebellious teenagers.
- Bake for 22–25 minutes. The edges should puff and crack slightly, the center will look set but still jiggle like a soft cheesecake, and the chocolate on top will be glossy and melted. If you wait until a toothpick comes out clean, you’ve overshot into cake territory; we want fudgy, not fluffy. Your kitchen will smell like someone opened a gourmet candy shop next to a banana plantation.
- Cool the pan on a rack for 10 minutes. This is the hardest part—walk away, scroll social media, fold laundry, do anything but slice, because steam trapped inside is finishing the bake. After the short wait, lift the sling onto a cutting board and slice into 8 generous bars or 16 bite-size squares using a sharp knife wiped clean between cuts for bakery-neat edges.
That's it—you did it. But hold on, I've got a few more tricks that'll take this to another level...
Insider Tricks for Flawless Results
The Temperature Rule Nobody Follows
Room-temperature eggs and peanut butter mix like eager party guests, while cold ones huddle in clumps like awkward wallflowers. Let everything sit on the counter for 20 minutes before mixing and you’ll achieve a batter so silky it practically pours itself. Cold ingredients shock the batter and can cause the chocolate to seize into chalky flecks instead of melting into glossy pools.
Why Your Nose Knows Best
Trust the aroma more than the timer. When the scent shifts from raw cocoa to toasted chocolate croissant, you’re within two minutes of perfect doneness. If you wait for the edges to pull away from the pan, you’ve crossed into dry territory; we want the sides just barely kissed with gold while the center still whispers “soft and gooey.”
The 5-Minute Rest That Changes Everything
After baking, tent the pan loosely with foil for 5 minutes. This mini sauna relaxes the oat fibers so the bars stay moist and slice without crumbling like ancient parchment. Skip this and you’ll get clean cuts but a mouthfeel closer to granola; embrace it and you’ll swear there’s secret caramel lurking inside.
Storage Zen
Once completely cool, layer the bars between parchment in an airtight tin. Add a single saltine cracker on top; it absorbs rogue moisture and keeps the chocolate snap intact for days. Your future self will thank you when midnight cravings strike and you discover they still taste oven-fresh.
Creative Twists and Variations
This recipe is a playground. Here are some of my favorite ways to switch things up:
Trail-Mix Thunder
Swap half the chocolate for dried cherries and a handful of roasted pumpkin seeds. The tart fruit pops against the rich cocoa, and the seeds add a nutty crunch that makes you feel like you’re munching on mountain energy.
Mocha Muscle
Dissolve a tablespoon of instant coffee in the vanilla extract and fold in espresso beans. The resulting buzz tastes like a mocha latte distilled into chewy form—perfect for 3 p.m. slump kicks.
White-Chocolate Raspberry
Replace dark chocolate with white and swirl in raspberry jam before baking. The sweet-tart combo feels like summer camp in bar form, and the pink streaks make you look like a pastry rock star.
Coconut Dream
Stir in shredded coconut and replace peanut butter with almond butter. Toast the coconut first until it smells like sunscreen and paradise. You’ll swear you’re on a tropical beach, minus the sand in your shoes.
Salted Caramel Swirl
Drizzle homemade or store-bought caramel over the top and drag a toothpick through for marbled art. Finish with flaky sea salt so each bite hits sweet, salty, and fudgy in perfect harmony.
Spiced Autumn
Add cinnamon, nutmeg, and a pinch of cloves, then fold in butterscotch chips. Suddenly you’ve got pumpkin banana bread energy bars that taste like October even when it’s July and your air conditioner is working overtime.
Storing and Bringing It Back to Life
Fridge Storage
Refrigerate in a sealed container for up to one week. The chocolate will firm up, giving you a candy-bar snap. Let a bar sit at room temp for ten minutes before eating so the banana flavor can unfurl; cold dulls sweetness, and we want all systems at full volume.
Freezer Friendly
Wrap each bar in parchment, then foil, and freeze for up to three months. Thaw overnight in the fridge or microwave for 30 seconds. Pro move: pop a frozen bar into your gym bag; by the time you finish your workout, it’s perfectly chilled and ready to refuel.
Best Reheating Method
Revive a refrigerated bar in a 300 °F oven for 5 minutes or air-fryer for 3. The chocolate re-melts, the edges crisp, and you get that just-baked experience without turning the whole pan into a science experiment. Add a tiny splash of water on the tray before reheating; it steams back to perfection.