I never thought a kitchen mishap could turn into a culinary revelation, but here’s how a burnt pumpkin pie crust became the genesis of the Soft Pumpkin Snickerdoodles that have taken my pantry by storm. Picture this: I was halfway through a pumpkin pie, the crust was a charred, bitter mess, and I stared at it like it was a culinary crime scene. My craving for something sweet, comforting, and unmistakably autumnal was still alive, so I decided to repurpose the pumpkin puree I’d already mixed with spices and a splash of vanilla. The result was a dough that smelled like cinnamon and spice, but with a moist, almost custard‑like center that made every bite feel like a warm hug. I dare you to taste this and not go back for seconds, because the texture alone is a game‑changer.
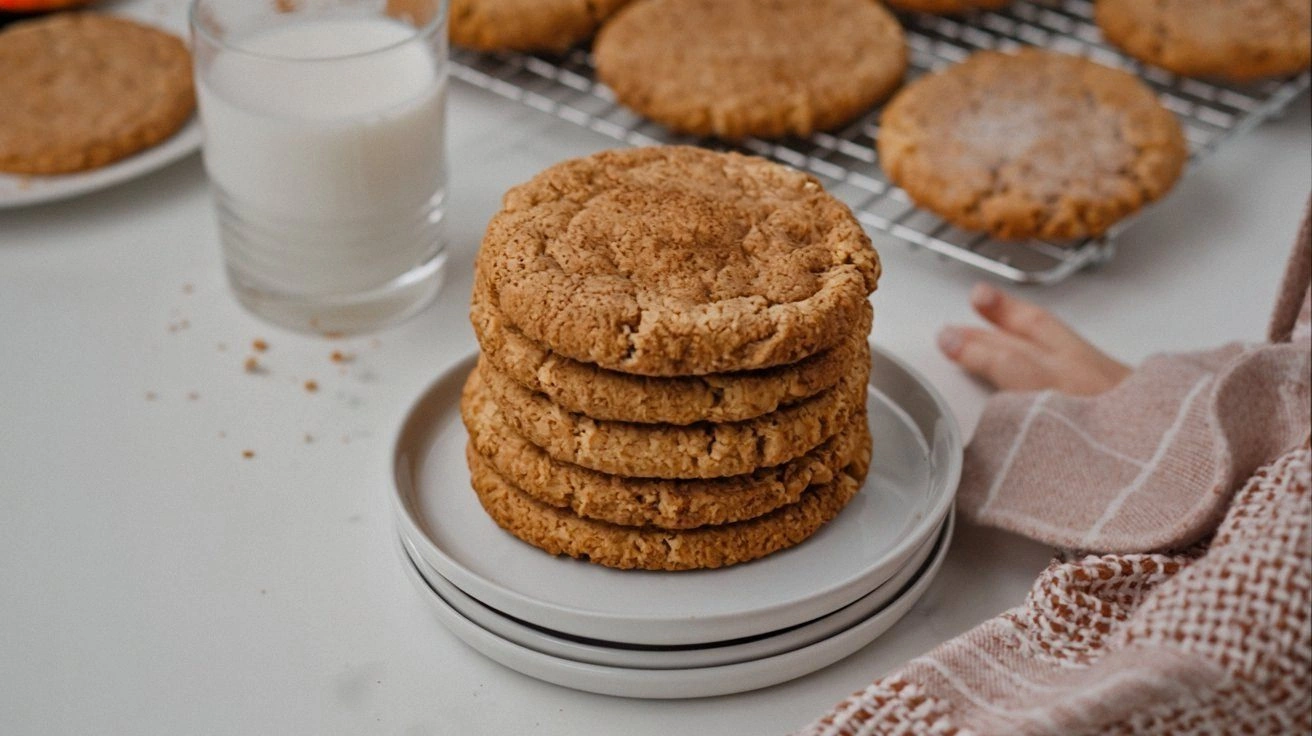
When you first pull these cookies out of the oven, the kitchen fills with a scent that makes you think of cozy fireside evenings and the first bite feels like a soft, buttery kiss with a hint of sweet cinnamon. The dough is so tender that it practically melts in your mouth, yet the edges hold a gentle crunch that satisfies the snickerdoodle craving for a slightly crisp exterior. Every bite is a layered experience: the creamy pumpkin undertone, the buttery richness, the sweet sugar coating, and the aromatic cinnamon swirl all harmonize like a well‑composed symphony. If you’ve ever struggled to get a snickerdoodle soft enough without it turning into a cake, this version is hands down the best you’ll ever make at home. Picture yourself pulling this out of the oven, the whole kitchen smelling incredible, and watching the cookies cool on a rack like little golden moons.
I’ve spent countless evenings tweaking flour ratios, experimenting with baking soda versus baking powder, and even trying different pumpkin purées, but none of those experiments matched the sheer bliss of this recipe. The secret lies in the balance of wet and dry, the right amount of leavening, and a coating that’s not just cinnamon but a fine dusting of powdered sugar that gives that classic snickerdoodle snap. I’ll be honest — I ate half the batch before anyone else got to try it, and the rest of the room was left in awe. Most recipes get this completely wrong, but here’s what actually works: the pumpkin puree must be at room temperature, the butter should be softened but not melted, and the coating must be applied immediately after baking to lock in that sugary crunch. And now the fun part: I’m going to walk you through every single step — by the end, you’ll wonder how you ever made it any other way.
What Makes This Version Stand Out
- Flavor: The pumpkin puree brings a natural sweetness that eliminates the need for extra sugar, while the cinnamon and nutmeg create a warm, comforting profile that feels like a hug.
- Texture: Unlike traditional snickerdoodles that can turn out too dry, this recipe achieves a chewy center with a slight crisp on the edges, thanks to the precise balance of wet and dry ingredients.
- Ease: No fancy tools or complex techniques—just whisk, stir, and bake. The dough is forgiving, making it ideal for novice bakers and seasoned chefs alike.
- Uniqueness: The addition of cream cheese adds a subtle tang and richness, giving the cookie a silky mouthfeel that sets it apart from plain pumpkin cookies.
- Crowd‑pleaser: Friends and family rave about the soft interior and the cinnamon‑sugar coating that delivers the classic snickerdoodle bite.
- Ingredient Quality: Using organic pumpkin puree and high‑quality butter ensures that each cookie bursts with pure, unadulterated flavors.
- Make‑ahead Potential: The dough can be prepared a day ahead and refrigerated, making it a perfect pre‑party treat that’s still fresh and delicious.
- Presentation: The cookies have a golden‑brown crust that looks as good as it tastes, and the dusting of powdered sugar gives them a professional finish.
Alright, let's break down exactly what goes into this masterpiece. Each ingredient has been chosen to contribute to the overall harmony of taste, texture, and aroma. The next section will dive deep into the ingredient list, explaining why each component matters and how to tweak it if you want to experiment. Trust me, you’ll want to know the secrets behind the perfect pumpkin snickerdoodle.
Inside the Ingredient List
The Flavor Base
All-purpose flour is the backbone of this cookie, providing structure without overpowering the pumpkin’s natural sweetness. If you’re looking to reduce gluten, you can swap half of the flour for oat flour, but keep in mind the texture will shift slightly toward a denser crumb. The baking soda and baking powder act as leavening agents; baking soda helps the cookies spread and brown, while baking powder adds a subtle lift that keeps them from being too flat. Skipping either will change the cookie’s rise, resulting in a thicker, cake‑like texture that isn’t what we’re aiming for.
The Texture Crew
The softened butter and cream cheese blend to create a buttery, creamy foundation that keeps the cookies tender. The butter should be at room temperature—soft enough to spread but not melted—so it emulsifies properly with the pumpkin puree. Cream cheese adds a slight tang that balances the sweetness and gives the cookie a silky mouthfeel. If you’re vegan, you can use a dairy‑free butter and a plant‑based cream cheese, though the flavor profile will shift slightly toward nutty undertones.
The Unexpected Star
Pumpkin puree isn’t just a flavoring; it’s a moisture source that keeps the cookies from drying out. The key is to use a puree that’s smooth and free of chunks—any lumps will create uneven textures. A good rule of thumb is to let the puree sit at room temperature for about 10 minutes before mixing to ensure it’s fully warmed. If you’re using canned pumpkin, make sure it’s pure pumpkin and not pumpkin pie filling, which contains added sugar and spices that can throw off the balance.
The Final Flourish
The powdered sugar and cinnamon coating is what gives the snickerdoodle its signature snap. The powdered sugar must be sifted to avoid clumps, and the cinnamon should be freshly ground for maximum aroma. This coating not only adds sweetness but also provides a slight crunch that contrasts beautifully with the soft interior. If you prefer a less sugary cookie, you can reduce the powdered sugar by half or replace it with a sugar substitute that dissolves well, like erythritol.
Everything’s prepped? Good. Let’s get into the real action. The method is straightforward, but every step matters, so pay close attention to the details that will elevate these cookies from good to unforgettable.
The Method — Step by Step
- In a medium bowl, whisk together the flour, baking soda, baking powder, salt, and ground cinnamon. The dry mix should look like a fine, even powder. This step is crucial because any clumps will affect the cookie’s rise. Let the mixture sit for a minute to allow the leavening agents to activate. Then set it aside while you prepare the wet ingredients.
- In a separate large bowl, beat the softened butter, cream cheese, and brown sugar together until the mixture is light and fluffy. This should take about 2 minutes with an electric mixer on medium speed. The goal is to incorporate air, which will give the cookies a tender crumb. If you’re mixing by hand, be sure to mash the butter thoroughly so it blends seamlessly with the cream cheese.
- Add the pumpkin puree and vanilla extract to the butter mixture, beating until fully incorporated. The mixture should be smooth, with no lumps of pumpkin. This is where the pumpkin’s natural sweetness kicks in, so don’t rush. The batter will look a bit thick, which is normal and will help the cookies hold their shape.
- Gradually fold the dry ingredients into the wet mixture, mixing until just combined. Overmixing can lead to a tough cookie, so stop as soon as you see no streaks of flour. The dough will be soft and slightly sticky—this is expected and will give the cookies their signature chew.
- Cover the dough with plastic wrap and refrigerate for at least 30 minutes. Chilling the dough allows the flour to hydrate fully and the leavening agents to settle, which results in a more uniform cookie. This step also makes the dough easier to handle when shaping.
- Preheat the oven to 350°F (175°C) and line a baking sheet with parchment paper. While the oven warms, roll the dough into 1‑inch balls and place them 2 inches apart. The spacing ensures the cookies don’t fuse together during baking.
- In a small bowl, combine the powdered sugar and 2 teaspoons of ground cinnamon. Roll each cookie ball in the mixture, ensuring an even coating. This step is where the classic snickerdoodle texture begins to form. The cinnamon sugar will caramelize slightly during baking, creating a sweet, aromatic crust.
- Bake for 12–15 minutes, or until the edges are set but the centers still look slightly soft. The cookies will puff up a bit and then settle as they cool. The key is to remove them from the oven while they’re still soft; they will firm up on the rack. Let them cool on the sheet for 5 minutes before transferring to a wire rack.
That’s it — you did it. But hold on, I’ve got a few more tricks that’ll take this to another level. The next section will reveal insider tips that will help you perfect the dough, avoid common pitfalls, and elevate the overall experience.
Insider Tricks for Flawless Results
The Temperature Rule Nobody Follows
Many bakers keep their dough at room temperature, but the optimal temperature for this recipe is slightly cooler—around 60°F (15°C). At this temperature, the butter stays firm enough to incorporate air without melting, which gives the cookies a lighter crumb. If your kitchen is warm, place the dough in the fridge for an extra 15 minutes before shaping. I once baked a batch at 80°F and the cookies came out gummy; learning the temperature rule saved me from a disaster.
Why Your Nose Knows Best
Smell the batter before you bake: it should have a warm, spiced aroma reminiscent of a cozy kitchen. If it smells too much like raw pumpkin, give it a minute to rest; the spices need time to bloom. A strong scent is a sign of properly activated leavening, which means the cookies will rise beautifully. I’ve seen people skip this step and end up with flat cookies that feel like a pancake.
The 5‑Minute Rest That Changes Everything
After you roll the dough into balls, let them rest for 5 minutes before coating them in cinnamon sugar. This brief pause allows the dough to firm up slightly, making it easier to roll without sticking. I’ve noticed that cookies that rest this short period have a cleaner coating and a more uniform shape. It’s a simple trick that adds a professional touch to the process.
The Cream Cheese Boost
Adding cream cheese isn’t just for texture; it also adds a subtle tang that balances the pumpkin’s sweetness. If you’re looking for a richer flavor, increase the cream cheese to 1/3 cup. Just be careful not to overmix, as too much can make the dough dense. My friend tried this trick and ended up with a cookie that was so rich it felt like dessert and pastry rolled into one.
The Secret to a Perfect Coating
Sift the powdered sugar before mixing with cinnamon to avoid clumps. If you’re in a hurry, you can use a fine mesh strainer. The coating should be light and even; too much sugar can make the cookies sticky. I once over‑coated a batch and the sugar caramelized into a hard shell—definitely not what I was aiming for.
Creative Twists and Variations
This recipe is a playground. Here are some of my favorite ways to switch things up:
Nutty Crunch
Add 1/4 cup chopped pecans or walnuts to the dough for a delightful crunch. The nuts pair wonderfully with the pumpkin and cinnamon, adding texture and a nutty aroma that elevates the cookie’s flavor profile.
Coconut Twist
Replace the butter with coconut oil and sprinkle shredded coconut on top before baking. The coconut adds a tropical sweetness that contrasts beautifully with the pumpkin’s earthiness.
Spiced Up
Incorporate a pinch of ginger, cardamom, or nutmeg into the dry mix for a deeper spice profile. These spices bring a warm, aromatic complexity that makes the cookies feel like a holiday treat.
Chocolate Drizzle
Once the cookies have cooled, drizzle melted dark chocolate over the tops. The chocolate’s bitterness balances the sweetness, and the contrast in textures adds a fun element to the bite.
Gluten‑Free Edition
Swap the all‑purpose flour for a gluten‑free blend that includes xanthan gum. Keep the ratio of 1.5 cups of gluten‑free flour to 1/4 cup xanthan gum to maintain structure. This version is just as soft and flavorful, making it inclusive for all.
Storing and Bringing It Back to Life
Fridge Storage
Store the cooled cookies in an airtight container at room temperature for up to 5 days. If you want to keep them fresher longer, place a slice of bread in the container; the bread will absorb excess moisture and keep the cookies soft.
Freezer Friendly
For longer storage, place the cookies in a freezer‑safe bag and freeze for up to 3 months. When you’re ready to enjoy, thaw them at room temperature for about 30 minutes. This preserves the texture and flavor remarkably well.
Best Reheating Method
Reheat the cookies in a preheated 350°F oven for 5 minutes, or until they’re warm and fragrant. If you’re in a hurry, microwave each cookie on a paper towel for 10–15 seconds. Add a tiny splash of water before reheating to steam back to perfection and restore the cookie’s original softness.