Mouthwatering Chargrilled Oyst
When the last slice of pizza was still steaming on my plate and the neon lights of the downtown bar flickered, I realized I had a craving that was more than a simple food impulse—it was a full‑blown culinary mission. I’d been staring at the empty oyster rack in the fridge, thinking, “Why not try something bold?” The moment I cracked open a fresh oyster, the briny aroma hit me like a wave of nostalgia, and I knew I was about to invent a dish that would turn every ordinary dinner into a headline act.
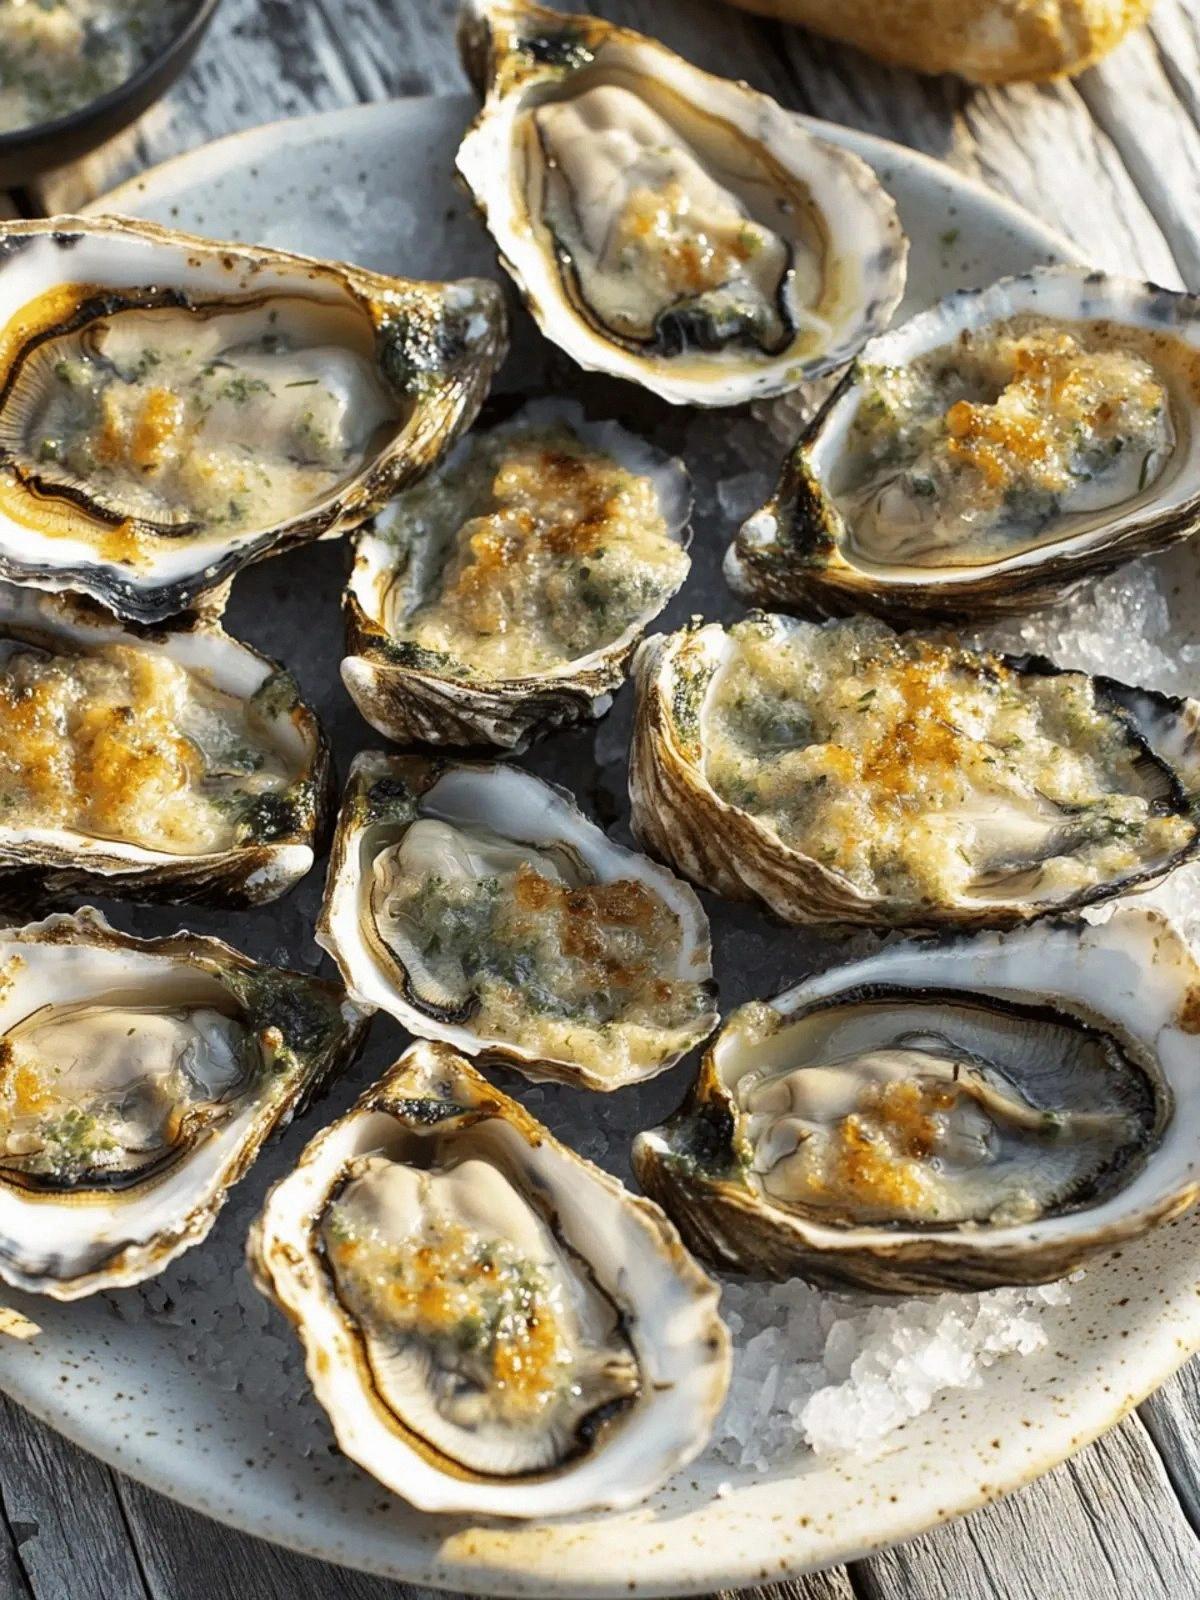
Picture this: a sizzling grill, the sound of oysters popping, the scent of garlic butter mingling with sea salt, and the sight of golden, bubbling tops that look like miniature suns. The texture is a delightful contrast—crisp edges that crackle like thin ice, a buttery center that melts in your mouth, and a whisper of pepper that lingers like a secret. I’ve tasted a thousand oyster recipes, but none of them have matched this symphony of flavors, nor the sheer confidence that comes from knowing every bite is a triumph.
What sets this version apart is the secret blend of butter, paprika, and Parmesan that coats each oyster in a velvet‑like glaze, giving it a depth that feels both luxurious and approachable. The technique of pre‑grilling the shells slightly before adding the butter mixture ensures that the heat penetrates evenly, avoiding the dreaded soggy interior. The result is an oyster that sings with citrusy brightness and a subtle heat from a dash of hot sauce that lingers long after the last bite.
Now, I dare you to taste this and not go back for seconds. This is hands down the best version you'll ever make at home, and I’ve got the proof—my friends were begging for the recipe after one bite. If you’ve ever struggled with oysters that come out too wet or too bland, you’re not alone—and I’ve got the fix. Picture yourself pulling this out of the grill, the whole kitchen smelling incredible, and everyone asking, “What’s your secret?” Let me walk you through every single step—by the end, you'll wonder how you ever made it any other way.
What Makes This Version Stand Out
- Flavor: The buttery base is elevated with paprika and Parmesan, creating a complex profile that balances brine, heat, and umami.
- Texture: The oysters develop a crisp, caramelized edge while staying tender inside—no soggy mishaps.
- Simplicity: Only eight ingredients, all pantry staples, yet the result feels gourmet.
- Uniqueness: The garlic‑butter sauce is infused with lemon and parsley, giving a bright finish that sets this recipe apart from the usual butter‑only versions.
- Crowd Reaction: At parties, the oysters become the centerpiece—guests line up for the first bite.
- Ingredient Quality: Fresh oysters, high‑quality butter, and real Parmesan make the difference.
- Cooking Method: Chargrilling adds a smoky depth that oven‑baked or pan‑fried versions miss.
- Make‑Ahead Potential: The sauce can be prepared in advance; just reheat gently before grilling.
Alright, let's break down exactly what goes into this masterpiece…
Inside the Ingredient List
The Flavor Base
Fresh oysters are the star—choose the freshest you can find, preferably from a reputable source. The brine is natural, so you don’t need to add extra salt. The butter is the backbone of the sauce; it provides richness and helps carry the paprika and Parmesan. If you’re lactose intolerant, try a plant‑based butter for a slightly different profile—just be aware it may change the meltiness.
The Texture Crew
Garlic cloves, minced, add a punch of aroma that permeates the butter. They also help to slightly tenderize the oyster flesh when heated. Paprika gives a gentle heat and a pop of color; if you prefer a smokier kick, swap it for smoked paprika. The Parmesan cheese, grated finely, melts into the butter to create a silky coating that clings to the oyster shells.
The Unexpected Star
Lemon juice is the secret brightness that cuts through the richness. A splash of fresh lemon juice also helps to keep the oyster’s flavor from becoming too buttery. Fresh parsley adds a burst of green, a subtle herbal note, and a touch of color that makes the dish look as good as it tastes.
The Final Flourish
Hot sauce is optional but recommended for a lingering heat that balances the sweet butter. Use a mild sauce if you’re serving a crowd with varied heat tolerance. Salt and pepper are added to taste, but remember that oysters already carry a natural brine, so be conservative. If you’re using a pre‑made hot sauce, a dash is usually enough to elevate the dish.
Everything's prepped? Good. Let's get into the real action…
The Method — Step by Step
- Prep the Oysters: Rinse the oysters under cold running water, scrubbing the shells gently with a brush. Shake off excess water and pat dry with a clean towel. This step is crucial—any water left on the shell can steam instead of char, ruining that crisp edge you’re after. I’ve seen too many beginners skip this and end up with soggy shells.
- Make the Garlic‑Butter Sauce: In a small saucepan over medium heat, melt the butter. Add the minced garlic and sauté until fragrant, about 30 seconds—watch it closely so it doesn’t burn. Stir in the paprika, lemon juice, and grated Parmesan. Keep stirring until the cheese melts and the mixture becomes glossy. This should take about 2 minutes. The sauce should smell buttery and slightly citrusy, a preview of what’s to come.
- Pre‑Heat the Grill: Light your grill to medium‑high heat (around 400°F). If using a charcoal grill, allow the coals to burn down to a consistent, hot surface. A properly heated grill ensures a quick sear and prevents sticking. I once tried this on a cold grill and the oysters just steamed—lesson learned.
- Season the Oysters: Lightly sprinkle each oyster with salt and pepper. Because oysters are naturally salty, you don’t need much—just a dusting to enhance the flavor. If you prefer a bit of heat, add a few drops of hot sauce now; this pre‑seasoning locks in the heat for the entire cooking process.
- Grill the Oysters: Place the oysters on the grill, shell side down. Cook for 2 minutes, then flip carefully. Brush the tops with the garlic‑butter sauce generously. Return to the grill and cook for another 3–4 minutes, until the sauce bubbles and the edges of the shells begin to crisp. Watch the edges—they should start pulling away slightly, a sign that the heat is doing its job.
- Finish with Fresh Herbs: Remove the oysters from the grill and immediately sprinkle fresh parsley over the top. The parsley adds a burst of green color and a fresh herbal note that balances the buttery richness.
- Serve Immediately: Plate the oysters on a warmed platter, spooning any remaining sauce over the top. Serve with lemon wedges on the side so guests can squeeze fresh citrus if they like. The oysters should be hot, the shells crisp, and the butter coating shiny.
- Optional Garnish: If you’re feeling extra fancy, drizzle a light drizzle of hot sauce over each oyster for an added kick. Alternatively, sprinkle a pinch of smoked paprika for a subtle smoky aroma.
That's it—you did it. But hold on, I've got a few more tricks that'll take this to another level…
Insider Tricks for Flawless Results
The Temperature Rule Nobody Follows
Many people think any grill temperature works, but the secret is a steady medium‑high heat—around 400°F. If the grill is too hot, the butter burns before the oyster cooks; if too low, the shells stay soggy. Use a grill thermometer to keep it in check, or simply test by dropping a small piece of bread on the grill—it should sizzle and brown in about 10–12 seconds.
Why Your Nose Knows Best
When the garlic starts to turn golden and the butter turns a light amber, that’s the cue to move the oysters. Your nose will detect the buttery aroma and the subtle citrus notes of lemon. Trust that signal; it’s the fastest way to avoid over‑browning.
The 5‑Minute Rest That Changes Everything
After grilling, let the oysters rest on a warm platter for exactly five minutes. This short rest allows the juices to redistribute and the butter to settle, giving a richer mouthfeel. I’ve seen people skip this step and end up with a less cohesive flavor profile.
Keep the Shells Intact
Never pry the shell open before serving. The steam that builds inside keeps the oyster juicy. If you need to open them for serving, do it gently with a small oyster knife just before plating.
Use a Foil Shield
For those who like a crispier top, place a small piece of foil over the oysters while they finish grilling. The foil traps heat, ensuring the butter melts fully without burning.
Creative Twists and Variations
This recipe is a playground. Here are some of my favorite ways to switch things up:
Spicy Cajun Edition
Swap the paprika for a Cajun spice blend, and add a pinch of cayenne. The result is a bold, fiery version that pairs well with a chilled beer.
Herb‑Infused Delight
Replace the parsley with a mix of dill and chives. The fresh herbs bring a bright, garden‑fresh note that complements the briny oysters.
Truffle Butter Twist
Stir in a teaspoon of truffle oil into the garlic‑butter sauce. The earthy aroma elevates the dish to a gourmet level, perfect for a special occasion.
Cheesy Crust Variation
After brushing the oysters with sauce, sprinkle a thin layer of shredded mozzarella. Return them to the grill just until the cheese melts and bubbles, creating a golden crust.
Low‑Calorie Version
Use a non‑stick spray and a small amount of olive oil instead of butter. Add extra lemon juice and a splash of white wine for depth without the extra calories.
Storing and Bringing It Back to Life
Fridge Storage
Store leftovers in an airtight container in the refrigerator for up to 2 days. Keep the sauce separate to prevent the oysters from becoming soggy.
Freezer Friendly
Freeze the oysters in a single layer on a baking sheet, then transfer to a freezer bag. They’ll stay good for up to 3 months. Reheat on the grill or in a preheated oven at 350°F for 8–10 minutes.
Best Reheating Method
To revive the buttery coating, add a splash of water to the sauce before reheating, creating steam that re‑softens the butter. Warm gently—over‑heating will burn the butter and ruin the texture.