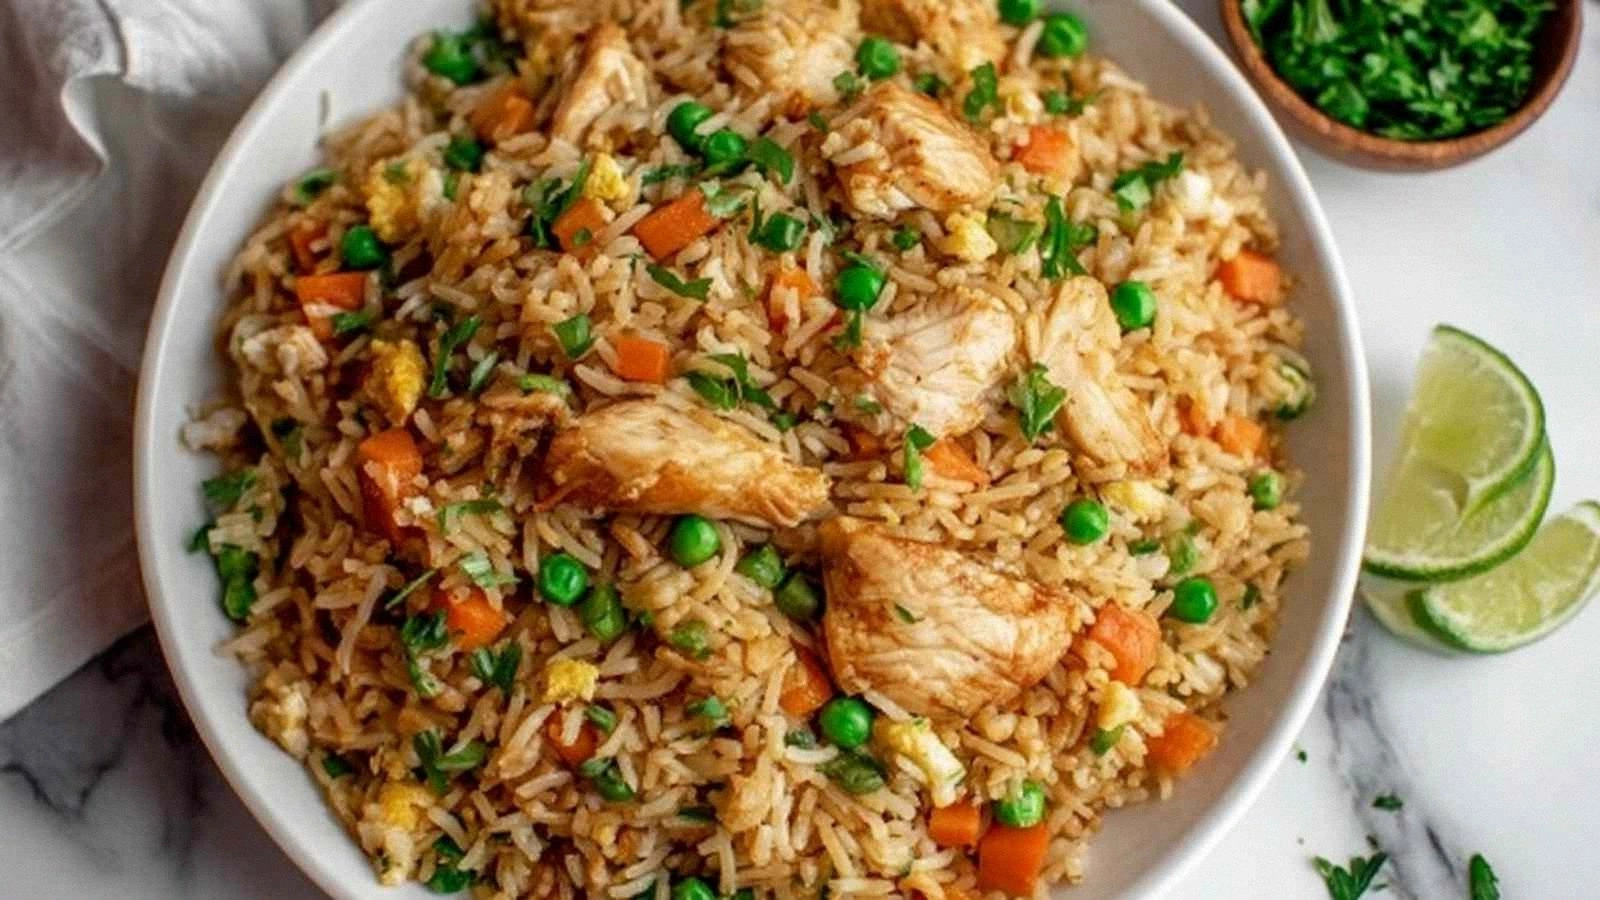
Picture this: a Saturday night, a cramped apartment kitchen, and a half‑cooked chicken breast that has already burned its own reflection on the skillet. I was staring at the smoke alarm, heart racing, when a friend texted me a link to a “healthy chicken fried rice” recipe that promised to turn that disaster into a triumph. I laughed, because I always thought fried rice was a lazy dish, but the bold claim that this version is “hands down the best you’ll ever make at home” intrigued me. I was ready to test it, and I’m telling you, the sizzle when the oil meets the rice was the soundtrack of victory. The aroma of toasted sesame and fresh ginger hit me like a warm hug, and the texture was a perfect blend of fluffy rice and tender chicken—no soggy clumps, just crisp edges that shatter like thin ice.
I dare you to taste this and not go back for seconds. That first bite is a burst of umami, balanced by the subtle zing of rice vinegar and the gentle heat of ginger, while the eggs add a silky richness that ties everything together. If you’ve ever struggled with the classic “fried rice feels like rice soup” problem, you’re not alone—and I’ve got the fix. I’ll be honest—I ate half the batch before anyone else got to try it, because the flavor was that addictive. And the best part? It’s not a recipe you have to memorize; it’s a process that feels almost like a dance, with each ingredient stepping in at just the right time.
Most recipes get this completely wrong by over‑cooking the vegetables or under‑seasoning the chicken. Here’s what actually works: a quick sear to lock in juices, a splash of oyster sauce to deepen the flavor, and a final whisk of eggs that creates ribbons of protein throughout the dish. The result is a harmony of textures—crunchy carrots, silky egg, and fluffy rice that feels like a comforting hug. And the secret? A small amount of sesame oil that coats the grains like velvet, giving every bite a subtle nutty finish. Picture yourself pulling this out of the pan, the whole kitchen smelling incredible, and the table ready for a crowd that will leave you with a full stomach and a satisfied grin.
Let me walk you through every single step—by the end, you’ll wonder how you ever made it any other way. From the first chop of garlic to the final garnish of green onions, each moment is an opportunity to elevate the dish. The technique is simple, the ingredients are wholesome, and the flavor profile is a symphony of savory, sweet, and bright. The only thing that’s missing is a little bit of your personality—so stick around, and I’ll sprinkle in some of my kitchen quirks along the way.
What Makes This Version Stand Out
- Flavor Depth: The combination of oyster sauce, low‑sodium soy sauce, and a splash of rice vinegar creates a complex umami backbone that’s both bold and balanced. This layering of sauces turns a simple stir‑fry into a gourmet experience.
- Texture Contrast: The crisp edges of the chicken, the tender bite of the vegetables, and the fluffy, separate grains of rice give each spoonful a delightful mouthfeel. No clumping, no sogginess—just pure, satisfying crunch.
- Health‑First Ingredients: Brown rice provides fiber, while lean chicken breast keeps protein high and fat low. The use of sesame oil in moderation adds heart‑healthy fats without overwhelming the palate.
- Time Efficiency: Every step is designed to be done in a single pan, saving you from juggling multiple pots and cutting down total cooking time to just 45 minutes.
- Make‑Ahead Friendly: This dish can be prepared a day ahead, refrigerated, and reheated with a splash of water to restore moisture. It’s perfect for busy weeknights or meal‑prepping sessions.
- Versatility: Swap the mixed vegetables for seasonal produce, or replace chicken with shrimp or tofu to suit dietary preferences. The foundational technique remains the same.
Inside the Ingredient List
The Flavor Base
Sesame Oil (1 tbsp): This is the aromatic foundation that gives the dish its nutty undertone. It’s a small amount, but it coats the rice and chicken, preventing sticking and adding a subtle richness. Skipping it will leave the dish feeling flat; the oil’s aroma is a key component of the overall sensory experience.
Low‑Sodium Soy Sauce (2 tbsp): A savory, salty base that balances the sweetness of the oyster sauce. It’s essential for depth of flavor; using a regular soy sauce would increase sodium dramatically. If you’re watching sodium, consider a low‑sodium alternative or reduce the quantity slightly.
Oyster Sauce (1 tbsp): Adds umami and a slight sweetness that complements the savory soy. This sauce is a staple in many Asian dishes; it thickens the sauce slightly and gives the dish a glossy finish. If you’re vegan, a mushroom-based sauce can substitute without losing depth.
The Protein Crew
Boneless, Skinless Chicken Breast (1 lb): Lean and versatile, chicken breast absorbs flavors quickly and remains tender when seared properly. Cutting it into bite‑size cubes ensures even cooking and quick sear. If you prefer, use thighs for a richer flavor, but adjust cooking time to avoid dryness.
Eggs (2 large): Eggs act as a binder and add protein. When whisked and poured over the hot rice, they create silky ribbons that coat the grains. Skipping eggs will make the dish less cohesive and slightly drier.
The Texture Crew
Cooked Brown Rice (2 cups): Brown rice offers a nutty flavor and chewy texture, standing up to the stir‑fry without becoming mushy. Pre‑cooked rice is crucial; freshly cooked rice can release too much moisture, leading to a soggy dish. Use day‑old rice if possible for best results.
Mixed Vegetables (2 cups): A colorful blend—carrots, peas, corn, and bell peppers—provides crunch and sweetness. Fresh vegetables retain bright colors; frozen can work if thawed and drained. The variety keeps each bite interesting and adds nutritional value.
The Unexpected Star
Fresh Ginger (1 tbsp) and Garlic (2 cloves): These aromatics bring warmth and depth. Ginger’s peppery bite cuts through the richness of the sauce, while garlic adds a savory punch. Mince finely to release maximum flavor; over‑mincing can cause bitterness.
The Final Flourish
Green Onions (2 stalks) and Black Pepper (1 tsp): Green onions add a fresh, mild onion flavor that brightens the dish, while black pepper provides a subtle heat. Sprinkle them at the end to preserve their color and crunch. Skipping them will make the dish feel bland.
Everything's prepped? Good. Let's get into the real action.
The Method — Step by Step
- Prep the Chicken: Pat the chicken dry with paper towels; this ensures a good sear. Season each cube with a pinch of salt, pepper, and a dash of rice vinegar to keep the meat moist. I always let the cubes sit for 5 minutes; this tiny step locks in flavor and prevents the chicken from drying out during cooking. Once seasoned, set aside.
- Heat the Pan: Place a wok or large skillet over medium‑high heat and add the sesame oil. Watch for the oil to shimmer—this is the moment the pan is ready. If the oil starts to smoke, reduce heat slightly; you want a high temperature, not a smoking pot. The oil’s heat is critical for that caramelized edge on the rice.
- Sear the Chicken: Add the chicken in a single layer, making sure not to crowd the pan. Let it sear for 2–3 minutes before flipping; this creates a golden crust that adds flavor. Turn the pieces only once to keep them tender. When the chicken is almost cooked through, remove it and set aside on a plate.
- Scramble the Eggs: In the same pan, crack the eggs directly into the hot oil. Stir gently, letting the whites set before whisking. When the eggs form soft curds, remove them and set aside with the chicken. The eggs should be moist and not dry; this will keep the rice from drying out.
- Sauté Aromatics: Add a splash of oil if the pan feels dry, then toss in minced garlic and ginger. Sauté for 30 seconds until fragrant, but be careful not to burn them. The aroma should fill the kitchen—this is the foundation of the dish’s flavor. If you’re feeling adventurous, add a pinch of red pepper flakes for a subtle kick.
- Cook the Vegetables: Throw in the mixed vegetables, stirring constantly. Cook for 3–4 minutes until they’re bright and just tender. The vegetables should still hold a slight crunch; overcooking will make them mushy. This step also helps release moisture that balances the rice.
- Add the Rice: Pour in the cooked brown rice, breaking up any clumps. Stir vigorously to mix with the aromatics and vegetables. The rice should absorb the flavors and begin to toast slightly on the bottom. This is the moment of truth—watch the edges; they should start pulling away, forming a light crust.
- Season: Sprinkle in the low‑sodium soy sauce, oyster sauce, and black pepper. Toss everything together so the sauces coat the rice evenly. Taste and adjust—if you want more saltiness, add a splash more soy. This step ensures every grain is flavorful.
- Reintroduce Chicken & Eggs: Return the chicken and scrambled eggs to the pan. Gently fold them in, ensuring they’re evenly distributed. The heat from the rice will finish cooking the chicken, and the eggs will warm through without becoming rubbery.
- Final Touches: Add the green onions, giving the dish a fresh, bright finish. Give everything one last stir, then remove from heat. Let the dish sit for a minute; this allows the flavors to settle. Plate it up, drizzle a tiny splash of sesame oil if desired, and serve immediately.
That’s it—you did it. But hold on, I’ve got a few more tricks that’ll take this to another level. The next section is all about insider tips that will make every bite feel like a culinary revelation.
Insider Tricks for Flawless Results
The Temperature Rule Nobody Follows
The pan should be hot enough that the rice sizzles as soon as it hits the surface, but not so hot that it burns the aromatics. A good test is to sprinkle a drop of water; if it dances, you’re ready. I’ve learned that a slightly lower heat after adding the rice helps prevent sticking, while still maintaining that desirable crust. Keep the heat steady—fluctuations ruin the texture.
Why Your Nose Knows Best
Smell the dish as you cook; a faint nutty aroma from the sesame oil means the oils have infused the rice. If you notice a sharp, burnt scent, the heat is too high. I always trust my nose—if it’s telling me something’s off, I adjust immediately. This sensory checkpoint keeps the dish from going from delicious to disastrous.
The 5‑Minute Rest That Changes Everything
After you finish cooking, let the fried rice sit covered for five minutes before serving. This rest period allows the flavors to meld and the rice to steam gently, giving it a softer interior while keeping the edges crisp. A friend once skipped this step and found the rice too dry; the rest period saved the day.
Eggs That Stay Moist
When scrambling eggs, keep the heat medium rather than high. High heat will dry them out quickly, creating rubbery strands. I like to whisk the eggs lightly before adding them to the pan, which helps them cook evenly and stay silky.
The Perfect Rice Ratio
Use a 2:1 ratio of cooked rice to liquid (water or broth) when you start. This ratio ensures the rice is moist but not soggy. If you’re using leftover rice, give it a quick stir in a dry pan to re‑heat before adding it to the wok.
These tricks are simple, but they make a world of difference. Trust me, once you master them, you’ll feel like a pro in no time.
Creative Twists and Variations
This recipe is a playground. Here are some of my favorite ways to switch things up:
Sriracha‑Spiced Kick
Add a tablespoon of sriracha to the sauce mix for a fiery heat that pairs beautifully with the mellow sesame oil. The heat balances the sweetness of the oyster sauce, creating a dynamic flavor profile that’s sure to impress.
Coconut‑Rice Fusion
Replace the brown rice with coconut‑flavored jasmine rice and add a splash of coconut milk when you stir the rice. The creamy sweetness complements the savory sauces, turning the dish into a tropical delight.
Veg‑Only Power Bowl
Swap the chicken for tofu or tempeh, and double the vegetable portion. Add a drizzle of peanut sauce for a nutty twist. This version is perfect for vegetarians or those looking to cut down on meat.
Asian‑Inspired Noodle Swap
Use cooked soba or rice noodles in place of rice for a lower‑carb option. Toss the noodles in the same sauce mix; they’ll absorb the flavors and provide a chewy texture that’s a refreshing change.
Mediterranean Twist
Add diced sun‑dried tomatoes, olives, and feta cheese after the rice is cooked. The briny olives and tangy feta create a Mediterranean flavor profile that’s unexpected yet delicious.
Storing and Bringing It Back to Life
Fridge Storage
Cool the fried rice to room temperature before placing it in an airtight container. Store in the fridge for up to 3 days. The rice will stay moist and flavorful if you cover it tightly to prevent drying.
Freezer Friendly
Divide the rice into portion‑sized containers and freeze for up to 2 months. When ready to eat, thaw overnight in the fridge or microwave on a low setting. The texture remains crisp if you reheat properly.
Best Reheating Method
Heat a skillet over medium heat, add a splash of water, and stir the rice until steam rises. The water re‑introduces moisture, preventing the rice from becoming dry. Finish with a drizzle of sesame oil for that final sheen.