It started with a kitchen nightmare: I had just finished a batch of apple crisp and the whole house smelled like burnt sugar. The crust had turned a deep, unforgiving brown, and the apples were soggy, a sad reminder that gluten‑free baking can be a gamble. I stared at the mess, a little defeated, and then a spark of rebellion lit up my culinary brain. I decided to rewrite the classic from scratch, turning a disaster into a triumph that would make even the most skeptical of friends swoon.
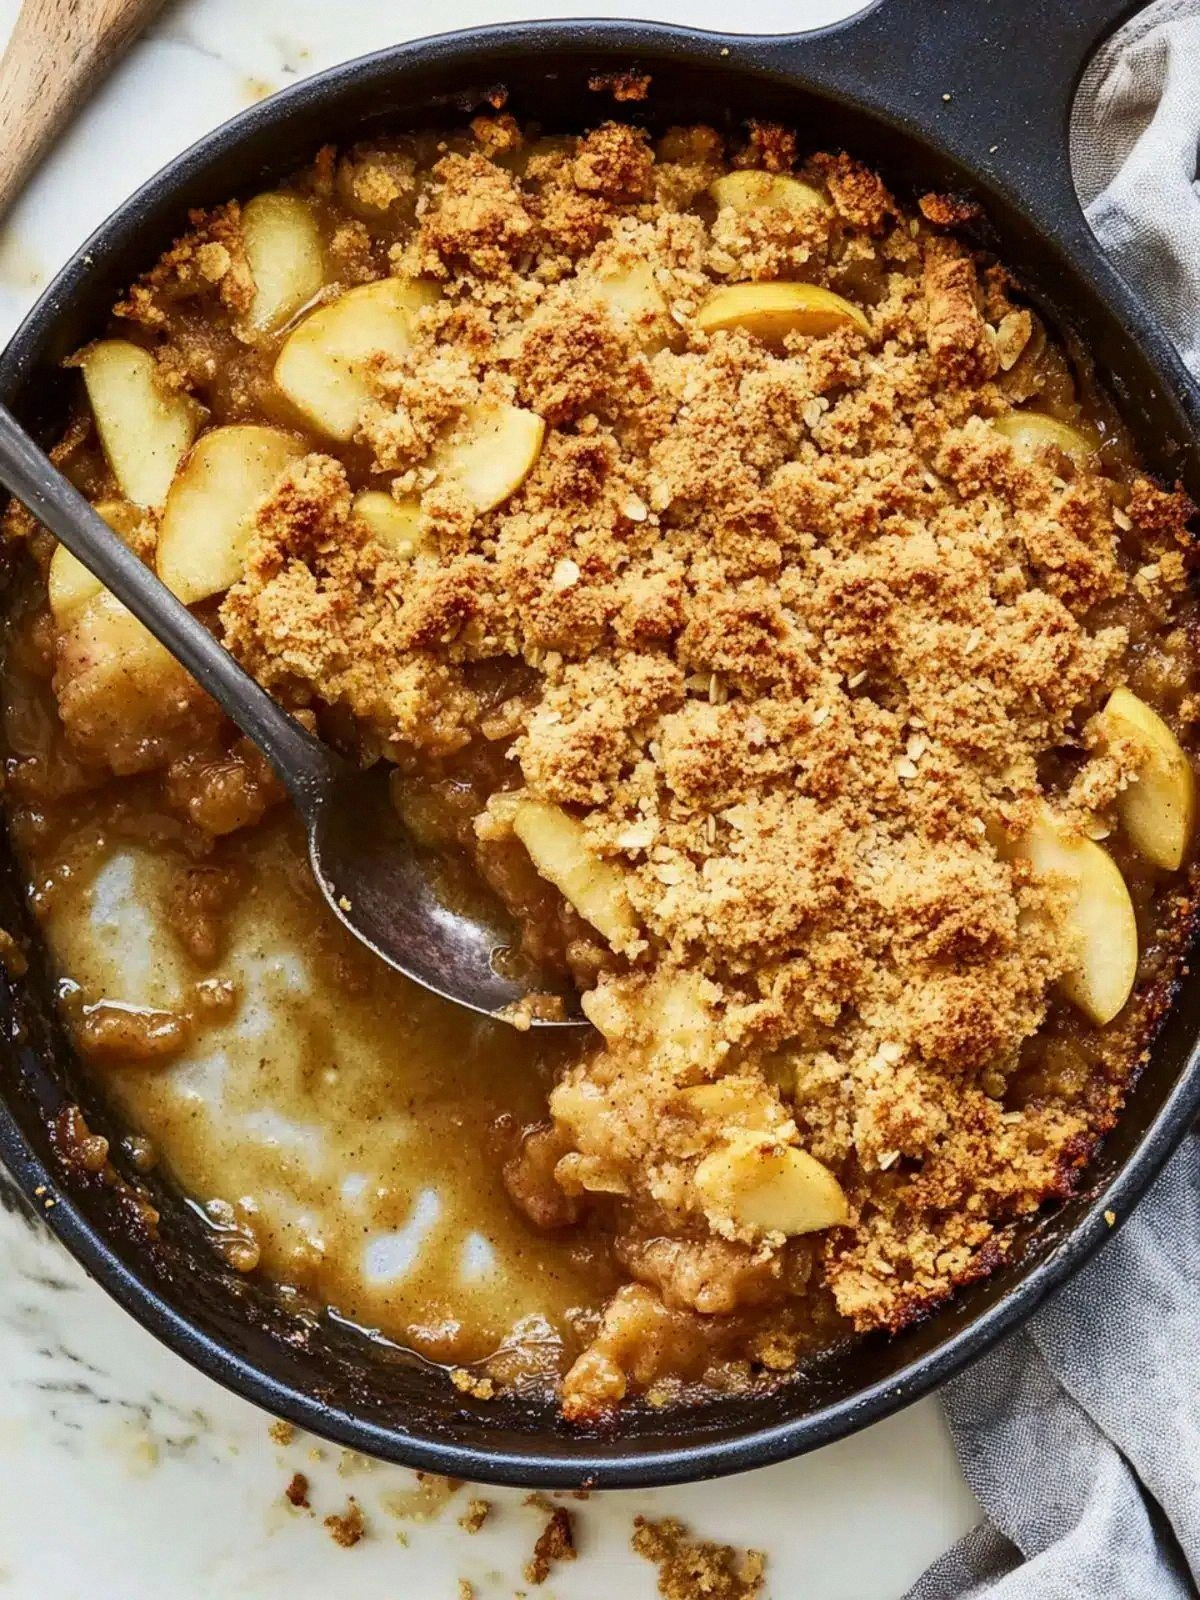
Picture this: the first bite is a burst of warm, spiced apples that cling to the tongue like a gentle hug, followed by a crunchy, buttery topping that crackles with each forkful. The scent of cinnamon and butter wafts through the air, mingling with the sweet, tart aroma of fresh apples. The texture is a delicate dance—soft, caramelized fruit balanced by a crisp, golden crust that shatters like thin ice when you bite into it. My friends were skeptical, but the moment they tasted it, their eyes widened, and I could feel the kitchen turning into a stage for culinary applause.
What makes this version stand out is not just the perfect balance of sweet and spice, but the meticulous attention to every ingredient and step. The crust is buttery yet crumbly, thanks to a blend of gluten‑free flour and quick oats that gives it a satisfying chew without the heaviness of traditional recipes. The apples are pre‑treated with lemon juice and cinnamon, ensuring they stay bright and flavorful, while the topping is a symphony of brown sugar, butter, and spices that caramelize beautifully. And the secret? A splash of milk in the topping that locks in moisture, keeping the crisp moist on the inside while remaining crisp on top.
I dare you to taste this and not go back for seconds. This is hands down the best version you'll ever make at home. I'll be honest — I ate half the batch before anyone else got to try it. Most recipes get this completely wrong. Here’s what actually works. Picture yourself pulling this out of the oven, the whole kitchen smelling incredible, and knowing you’ve nailed the ultimate gluten‑free apple crisp. Let me walk you through every single step — by the end, you'll wonder how you ever made it any other way.
What Makes This Version Stand Out
- Taste: The apple filling is a harmonious blend of tartness and sweetness, amplified by a generous dose of cinnamon and a hint of lemon. The crust's buttery richness complements the fruit without overpowering it, creating a layered flavor profile that lingers on the palate.
- Texture: The topping is perfectly crisp on the outside yet tender and slightly chewy on the inside, thanks to the combination of quick oats and gluten‑free flour. The apples remain firm but juicy, offering a satisfying bite that contrasts with the crumbly crust.
- Simplicity: With only fifteen minutes of prep and thirty minutes of cook time, this recipe fits easily into a busy weeknight routine. The ingredient list is short, and the instructions are straightforward, making it accessible for both seasoned bakers and novices.
- Uniqueness: The use of melted butter in the topping, a splash of milk, and a second round of cinnamon and sugar adds depth and complexity rarely seen in standard apple crisps.
- Crowd Reaction: Friends and family rave about how this crisp is the only one that keeps them coming back for seconds. It's become a staple at gatherings, and even the gluten‑free crowd can’t resist its indulgent flavor.
- Ingredient Quality: Every component is chosen for its ability to deliver on flavor and texture. The gluten‑free all‑purpose flour is fortified with xanthan gum, ensuring a tender crumb, while the quick oats provide a subtle nutty undertone.
Alright, let's break down exactly what goes into this masterpiece.
Inside the Ingredient List
The Flavor Base
The foundation of this crisp is the blend of gluten‑free all‑purpose flour and quick oats. The flour, fortified with xanthan gum, gives the topping a tender, crumbly base that holds together without becoming doughy. Quick oats add a subtle nutty flavor and a pleasing chew that balances the buttery sweetness. Together, they create a crust that rises just enough to develop a golden crust while remaining soft enough to bite through. If you skip the oats, the topping will feel too dense; if you omit the flour, the crumb will crumble apart.
The Sweetness Layer
Light brown sugar is the star of the sweet layer, providing deep molasses notes that caramelize during baking. The first 3/4 cup of sugar forms the base of the topping, while the second 1/4 cup is mixed into the apple filling to sweeten the fruit itself. The sugar’s moisture content ensures that the apples stay juicy and the topping stays moist, preventing a dry, brittle crust. A quick swap? Try using coconut sugar for a tropical twist, though the caramelization might be slightly slower.
The Spice Palette
Ground cinnamon is the aromatic hero that ties the entire dish together. The first teaspoon is baked into the topping, infusing it with warm, spicy undertones, while the second teaspoon is added to the apples, creating a fragrant, evenly distributed flavor. Cinnamon’s natural sweetness pairs beautifully with apple’s tartness, and it also has a subtle anti‑inflammatory effect, making your dessert a little kinder to your body. If you’re a spice enthusiast, feel free to add a pinch of nutmeg or allspice for a deeper profile.
The Unexpected Star
Melted butter and a splash of milk might seem ordinary, but they’re the secret weapons that elevate this crisp. Butter brings a rich, velvety mouthfeel to the topping, while the milk locks in moisture, preventing the crust from drying out during the 30‑minute bake. Together, they create a topping that’s both crisp and tender. If you’re vegan, replace butter with coconut oil and use almond milk for a similar effect.
Everything's prepped? Good. Let's get into the real action.
The Method — Step by Step
- Preheat your oven to 375°F (190°C). While the oven heats, toss the chopped apples in a large bowl with lemon juice, 1/4 cup of the light brown sugar, 1 tsp of cinnamon, and 1 tsp of salt. This step ensures the apples stay bright and flavorful, and the lemon juice prevents oxidation. Make sure the apples are evenly coated; this will help them release their juices during baking.
- Spread the apple mixture evenly in a 9‑inch square baking dish or a cast‑iron skillet. Press down lightly with the back of a spoon to compact the apples slightly, which helps them cook evenly and form a beautiful base for the topping. The dish should feel firm, not mushy.
- In a separate bowl, combine the gluten‑free flour, quick oats, 3/4 cup light brown sugar, baking powder, 1 tsp of cinnamon, 1/4 tsp salt, and 1/2 cup softened butter. Use a pastry cutter or your fingers to blend until the mixture resembles coarse crumbs. The butter should be cold enough to stay in small pieces; this will create a flaky texture. If the mixture feels too dry, add a splash of milk to bring it together.
- Drizzle 1/4 cup melted butter over the apple layer. The butter will seep into the apples, adding richness and helping the topping brown beautifully. Use a spoon to spread the butter evenly, ensuring every apple gets a touch of glossy fat. This step also helps the topping adhere to the fruit, preventing a loose crust.
- Sprinkle the crumb mixture evenly over the apples, making sure to cover the entire surface. The crumbs should be slightly moist, but not wet. The goal is a golden, slightly caramelized crust that cracks when you bite into it. If you prefer a darker crust, press the crumbs into the apples lightly.
- Bake for 30 minutes, or until the topping is golden brown and the apples are bubbling. The aroma of caramelized sugar and cinnamon will fill your kitchen, creating a cozy, inviting atmosphere. Check the crisp after 25 minutes; if the edges are browning too fast, tent the dish with foil to prevent burning.
- Let the crisp cool for at least 10 minutes before serving. This allows the juices to settle, making it easier to scoop out individual portions. The cooling time also helps the topping firm up slightly, giving you that satisfying crunch in every bite.
- Serve warm, optionally with a scoop of vanilla ice cream or a dollop of whipped cream for an extra indulgent touch. The contrast between the hot apple filling and the cold cream creates a delightful textural harmony that elevates the entire dessert.
That's it — you did it. But hold on, I've got a few more tricks that'll take this to another level.
Insider Tricks for Flawless Results
The Temperature Rule Nobody Follows
Most people bake apple crisp at 350°F, but 375°F gives that perfect golden crust while keeping the apples tender. The higher temperature caramelizes the sugars faster, creating a crisp that shatters like thin ice when you bite into it. If you’re using a convection oven, reduce the temperature by 25°F to avoid over‑browning.
Why Your Nose Knows Best
Your nose can detect when the sugar has begun to caramelize. A subtle, sweet, toasty scent is a sign the crisp is near perfection. If the aroma smells too sugary or burnt, pull it out immediately. Trust your instincts; the scent is your best judge of doneness.
The 5‑Minute Rest That Changes Everything
Letting the crisp rest for five minutes after baking allows the juices to redistribute, preventing a sticky mess when you scoop. The topping also firms up during this brief cooling period, giving you that satisfying crunch. This simple step often separates a good crisp from a great one.
Use a Silicone Mat for Easy Cleanup
A silicone baking mat keeps the crisp from sticking, making cleanup a breeze. It also ensures even heat distribution, preventing hot spots that can burn the crust. After the crisp cools, just lift the mat and the whole dish will come out cleanly.
Swap Butter for Coconut Oil for a Vegan Version
If you’re vegan, coconut oil works beautifully in place of butter. It provides a subtle coconut flavor that pairs well with apples and cinnamon. Use the same quantity (1/2 cup), and the crisp will still be golden and flaky.
Keep Apples Fresh with Lemon Juice
The lemon juice not only adds brightness but also prevents the apples from browning. This is especially useful if you’re prepping the apples a day ahead. Toss them in lemon juice and cover; they’ll stay fresh and vibrant until you’re ready to bake.
Creative Twists and Variations
This recipe is a playground. Here are some of my favorite ways to switch things up:
Maple‑Glazed Apple Crisp
Replace the light brown sugar with maple syrup and add a splash of maple extract to the topping. The result is a sweet, caramel‑like flavor that pairs beautifully with the apples. This version is perfect for holiday gatherings.
Spiced Apple & Peanut Butter Crisp
Add a dollop of peanut butter between the apple layer and the topping for a nutty, protein‑packed twist. Sprinkle crushed peanuts on top before baking for extra crunch. This variation is a hit with kids and adults alike.
Apple & Pear Crisp Fusion
Combine diced apples with pears for a subtle, buttery sweetness. Pears add a delicate flavor that balances the cinnamon, creating a more complex taste profile. This fusion is a great way to use up seasonal fruit.
Chocolate‑Chip Apple Crisp
Fold in a handful of semi‑sweet chocolate chips into the crumb mixture before baking. The chocolate melts into pockets of gooey richness, adding a decadent layer to each bite. Serve with a scoop of vanilla ice cream for maximum indulgence.
Almond‑Lemon Apple Crisp
Replace the butter in the topping with almond butter and add lemon zest to the apple mixture. The almond butter provides a nutty undertone that complements the apple’s natural sweetness, while the lemon zest adds a fresh, bright note.
Storing and Bringing It Back to Life
Fridge Storage
Store leftovers in an airtight container in the refrigerator for up to four days. The crisp will stay firm, and the flavors will deepen over time. When reheating, place it in a preheated oven at 350°F for 10 minutes to restore crispness.
Freezer Friendly
Wrap the cooled crisp tightly in plastic wrap, then place it in a freezer bag. It can be stored for up to three months. Thaw overnight in the refrigerator before reheating. This method preserves the texture and flavor, making it a convenient make‑ahead option.
Best Reheating Method
To reheat, preheat the oven to 350°F (175°C). Place the crisp on a baking sheet and bake for 10‑12 minutes, or until heated through. Add a splash of water to the bottom of the pan before reheating to create steam, which keeps the crust from drying out. Serve warm for the best experience.