I was halfway through a disastrous week of burnt toast, soggy oatmeal, and a fridge that looked like a crime scene when my roommate dared me to create something that would actually make us both proud. I accepted the challenge, grabbed a dusty bag of basmati rice, a couple of cans of chickpeas, and a handful of spices that had been hiding in the back of my pantry. The result? A dish that turned my tiny kitchen into a five‑star restaurant kitchen, and a flavor explosion that made my neighbor knock on the door begging for the recipe. I dare you to taste this and not go back for seconds.
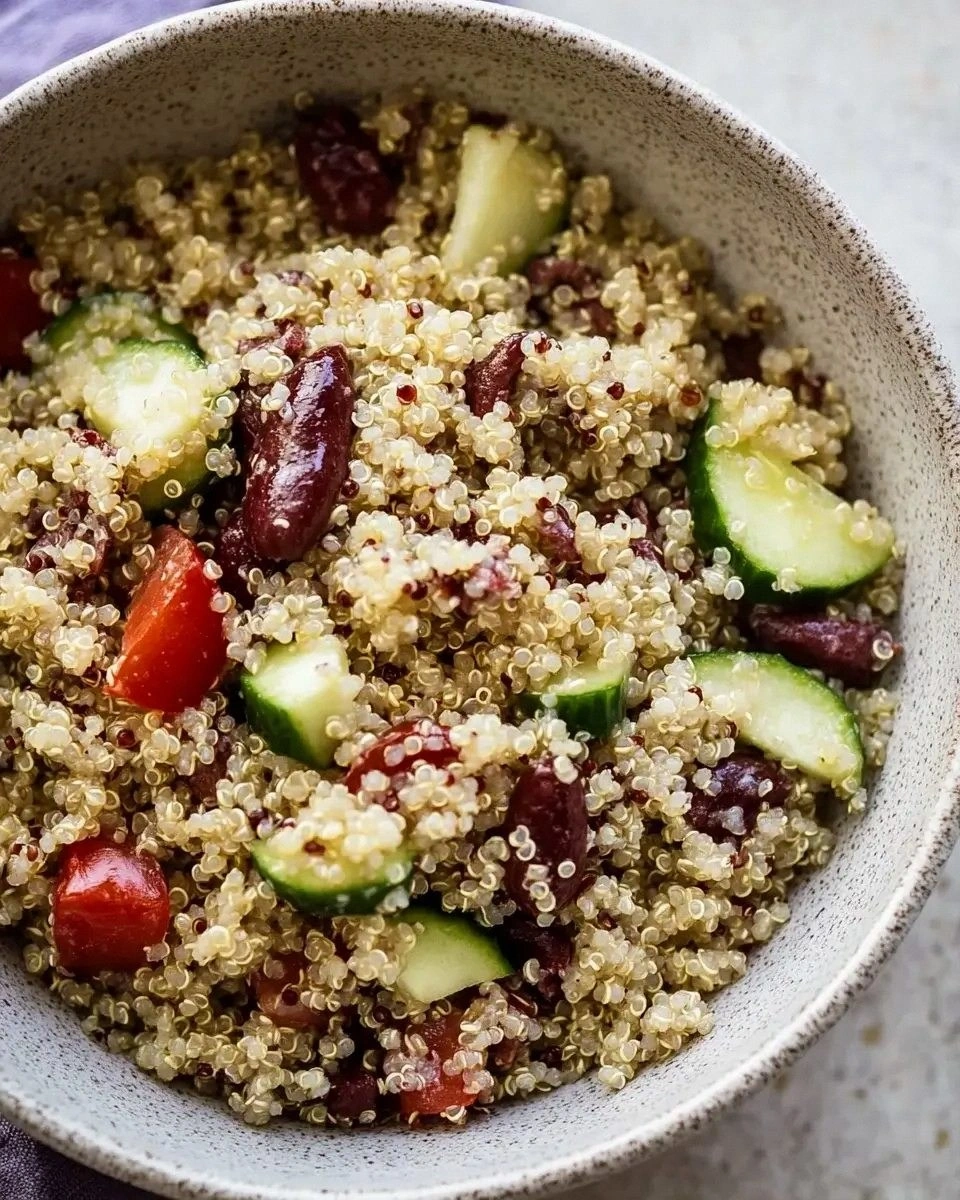
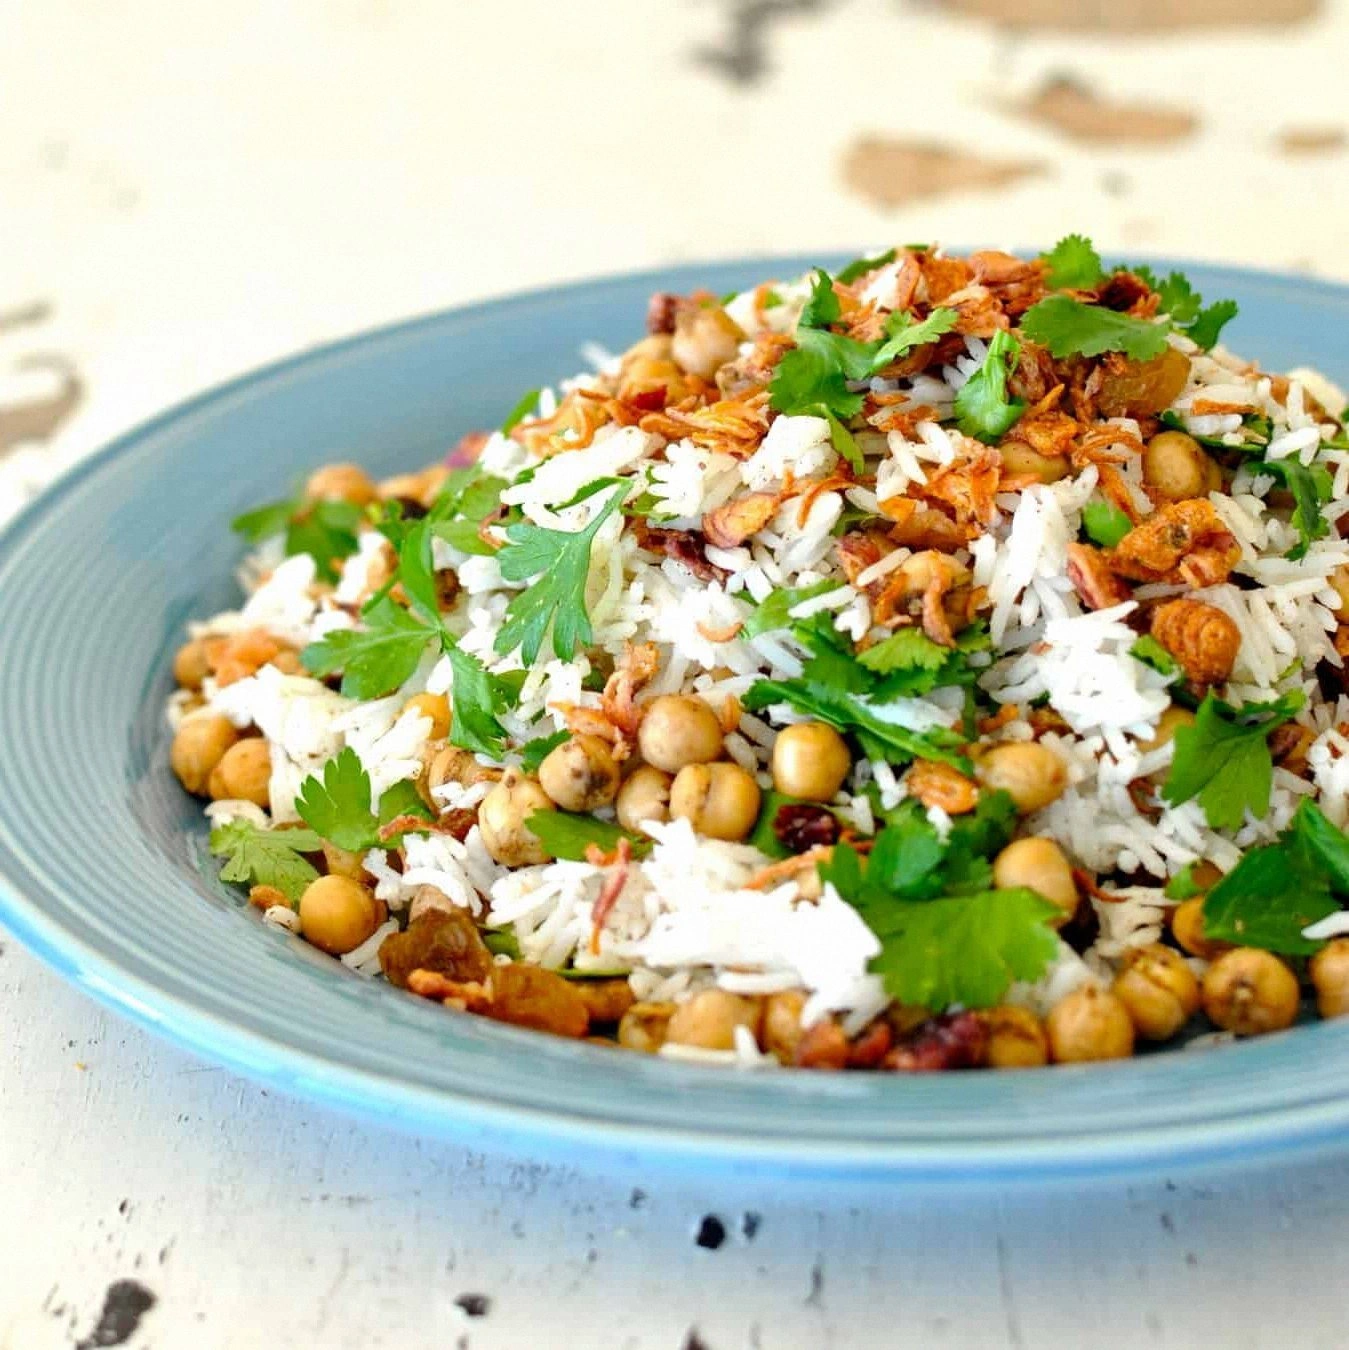
Picture this: the moment the olive oil hits the pan, you hear a low sizzle that feels like a tiny applause. The aroma of cumin and garam masala spirals upward, hugging the air like an old friend, while the rice swells in a pot of simmering water, each grain puffing up like a perfectly timed balloon. The sultanas add a burst of sweet sunshine that contrasts with the earthy chickpeas, and the fried shallots crown the whole thing with a crunchy, caramelized crunch that shatters like thin ice under a spoon. When you finally stir everything together, the colors mingle—golden rice, ivory chickpeas, deep green herbs—creating a visual symphony that makes you want to snap a photo before you even taste it.
Most recipes get this completely wrong. They either drown the rice in sauce, forget the crucial “toasted” step for the spices, or skip the finishing flourish of fresh herbs and fried shallots. I’ve tried those shortcuts, and let’s just say the end result was more “meh” than “marvelous.” This version stands out because every ingredient is treated like a star, not a background extra. The rice is cooked separately to keep it fluffy, the chickpeas are lightly sautéed to develop a caramelized crust, and the herbs are folded in at the last second so they stay bright and aromatic.
What really blew my mind was the secret weapon: a handful of sultanas (or currants, if you’re feeling fancy). They add a whisper of sweetness that balances the warm spices, and they stay plump even after the whole dish has been cooked. I’ll be honest — I ate half the batch before anyone else got to try it, and the leftovers still tasted like they were fresh out of the pot. Okay, ready for the game‑changer? Let me walk you through every single step — by the end, you’ll wonder how you ever made it any other way.
What Makes This Version Stand Out
- Taste: The marriage of cumin, garam masala, and a dash of sultanas creates a layered flavor profile that feels both familiar and exotic.
- Texture: Fluffy basmati rice meets buttery chickpeas and crispy fried shallots for a contrast that keeps every bite interesting.
- Simplicity: Only ten ingredients, yet each one plays a pivotal role—no unnecessary steps, no mystery sauces.
- Uniqueness: The sweet‑savory balance is rare in pilafs; the sultanas are the secret that turns ordinary into unforgettable.
- Crowd Reaction: Guests claim it’s “the best thing I’ve ever had at a potluck,” and they’ll ask for the recipe before the first bite even cools.
- Ingredient Quality: Using basmati rice and high‑quality canned chickpeas ensures each grain stays separate and each pea stays firm.
- Cooking Method: Separate cooking of rice and chickpeas preserves texture, while a final toast in the pan locks in flavor.
- Make‑Ahead Potential: This pilaf actually tastes better after a few hours, making it perfect for meal prep or party planning.
Inside the Ingredient List
The Flavor Base
Cumin and garam masala are the dynamic duo that give this pilaf its unmistakable warmth. The cumin offers an earthy, slightly smoky note, while garam masala—an aromatic blend of cardamom, cinnamon, and cloves—adds a sweet‑spicy depth. Skipping either will leave the dish feeling flat, like a song missing its chorus. If you can’t find garam masala, a pinch of ground cinnamon and a dash of ground coriander can mimic the profile, but the authentic blend is worth hunting down.
The Texture Crew
Basmati rice is the hero of the texture department. Its long grains stay separate when cooked properly, providing that airy, fluffy mouthfeel. If you swap it for a short‑grain rice, you’ll end up with a sticky mush that defeats the purpose of a pilaf. The chickpeas, drained and rinsed, bring a buttery bite; they’re tossed in a little olive oil and a pinch of salt to develop a golden crust that adds a satisfying chew.
The Unexpected Star
Sultanas (or currants) are the secret sweet element that balances the savory spices. Their tiny, plump bursts of flavor act like surprise confetti in each spoonful. If you skip them, the dish leans heavily toward spice, which can overwhelm the palate. A good alternative is golden raisins, but keep the quantity the same to maintain that perfect sweet‑savory harmony.
The Final Flourish
Fresh parsley and cilantro (coriander) leaves are folded in at the very end, providing a bright, herbaceous lift that cuts through the richness. The fried shallots add a caramelized crunch that feels like a confetti topping for the whole dish. If you forget the herbs, the pilaf will taste competent but lack that final pop of freshness that makes it unforgettable. For a milder flavor, you can use just parsley, but the combination of both herbs is what gives the dish its signature green sparkle.
Everything's prepped? Good. Let's get into the real action…
The Method — Step by Step
Start by rinsing the basmati rice under cold water until the runoff is clear. This removes surface starch and prevents the grains from sticking together. Transfer the rice to a saucepan, add 1½ cups of water, sprinkle in ½ tsp cooking salt, and bring to a boil. Once boiling, reduce the heat to a gentle simmer, cover, and let it cook for 12‑15 minutes until the water is fully absorbed and the grains are tender. Remove from heat and let it sit, covered, for another 5 minutes—this steam‑bath step is pure magic.
While the rice is doing its thing, heat 1 tbsp olive oil in a large skillet over medium heat. Add the fried shallots (½ cup) and let them sizzle until they turn a deep amber, about 2‑3 minutes. This is the moment of truth: you should hear a gentle crackle, and the aroma will be nutty and sweet. Once they’re golden, set them aside on a paper towel to stay crisp.
In the same skillet, add a splash more olive oil if needed, then sprinkle in 1 tsp ground cumin and 1 tsp garam masala. Stir constantly; you’ll notice the spices darken just a shade and emit a fragrant, almost sweet perfume. Be careful not to burn them—if the pan starts to smoke, lower the heat immediately.
Drain and rinse the 1½ tins (≈600 g) of chickpeas. Pat them dry with a clean kitchen towel to remove excess moisture. Toss the chickpeas into the skillet, sprinkle ¼ tsp cooking salt, and let them sauté for 5‑7 minutes, stirring occasionally. You’re looking for a light crust to form—those golden speckles are the secret to a pilaf that never feels soggy.
Now stir in ¼ cup sultanas (or currants). Their tiny sweetness will melt slightly, coating the chickpeas and rice with a subtle glaze. Let the mixture cook for another 2 minutes, allowing the sultanas to plump up and release their juices.
Fluff the cooked basmati rice with a fork, then gently fold it into the skillet, mixing until the rice is evenly coated with the spiced chickpea‑sultana mixture. Season with a pinch of black pepper and taste for salt—add a little extra if needed. The rice should look glossy, each grain separated, and the whole pan should emit a warm, inviting aroma.
Finally, turn off the heat and fold in the fresh herbs: ¼ cup parsley leaves and ¼ cup coriander (cilantro) leaves. Toss in the reserved fried shallots for that final crunch. Let the pilaf rest for 3‑4 minutes; this allows the herbs to wilt just enough to release their bright flavors without losing their color.
Serve the pilaf hot, directly from the pan or transferred to a serving bowl. Picture yourself pulling this out of the oven, the whole kitchen smelling incredible, and the first spoonful delivering a perfect balance of savory, sweet, and herbaceous notes. That sizzle when it hits the pan? Absolute perfection. This next part? Pure magic. And now the fun part—tasting!
That's it — you did it. But hold on, I've got a few more tricks that'll take this to another level...
Insider Tricks for Flawless Results
The Temperature Rule Nobody Follows
Never start the rice on high heat. A gentle simmer keeps the grains from bursting and turning gummy. I once tried a “quick boil” and ended up with a clumpy mess that stuck to the bottom of the pot. Keep the lid on, and trust the low, steady heat—it’s the secret to that restaurant‑style fluffiness.
Why Your Nose Knows Best
Your sense of smell is the ultimate doneness gauge. When the cumin and garam masala become fragrant, that’s your cue to move on. If you wait too long, the spices can turn bitter. So, stay close, inhale deeply, and let your nose be the timer.
The 5‑Minute Rest That Changes Everything
After mixing the rice with the chickpea mixture, give it a brief rest off the heat. This allows the steam to redistribute, keeping the rice fluffy and preventing it from drying out. A friend tried to serve it immediately and complained the texture was “a bit harsh.” A quick five‑minute pause solved that problem instantly.
Fry the Shallots Like a Pro
For ultra‑crisp shallots, slice them thinly and fry them in oil at medium‑low heat until they turn a deep amber. Then, drain on paper towels. This slow‑cook method prevents burning and gives you a crunchy topping that stays crisp even after the pilaf sits.
Season in Layers, Not All at Once
Add a pinch of salt at each stage—rice, chickpeas, and final mix. This layered seasoning ensures depth without ever becoming overly salty. I once seasoned everything at the end and the dish tasted flat; spreading the salt out made each bite pop.
Creative Twists and Variations
This recipe is a playground. Here are some of my favorite ways to switch things up:
Mediterranean Spin
Swap garam masala for a teaspoon of dried oregano and add a handful of Kalamata olives. The olives introduce a briny bite that pairs beautifully with the herbs, turning the pilaf into a sun‑kissed Mediterranean side.
Spicy Kick
Add a finely diced jalapeño or a pinch of cayenne pepper when you toast the spices. This gives the dish a subtle heat that builds without overwhelming the sweet sultanas.
Nutty Crunch
Stir in ¼ cup toasted slivered almonds or pistachios just before serving. The nuts add a buttery crunch that complements the fried shallots and adds a visual pop of green or gold.
Vegan Protein Boost
Mix in a cup of cooked quinoa or diced tempeh after the chickpeas are seared. This adds extra protein for athletes or anyone looking for a heartier meal without changing the flavor profile too much.
Sweet Breakfast Twist
Replace the sultanas with dried apricots, add a dash of cinnamon, and serve the pilaf warm with a dollop of Greek yogurt. It becomes a sweet‑savory breakfast that’s both comforting and energizing.
Storing and Bringing It Back to Life
Fridge Storage
Let the pilaf cool to room temperature, then transfer it to an airtight container. It will keep fresh for up to 4 days. When reheating, add a splash of water (about 2 tbsp) to revive the steam and prevent the rice from drying out.
Freezer Friendly
Portion the cooled pilaf into freezer‑safe bags or containers. It freezes beautifully for up to 3 months. To reheat, thaw overnight in the fridge, then warm in a skillet with a drizzle of olive oil and a tablespoon of water, stirring until fluffy.
Best Reheating Method
The stovetop method is king. Heat a non‑stick pan over medium heat, add a teaspoon of olive oil, then the frozen or refrigerated pilaf. Sprinkle a tablespoon of water, cover, and let steam for 3‑4 minutes, stirring occasionally. The result is as if it were freshly made.