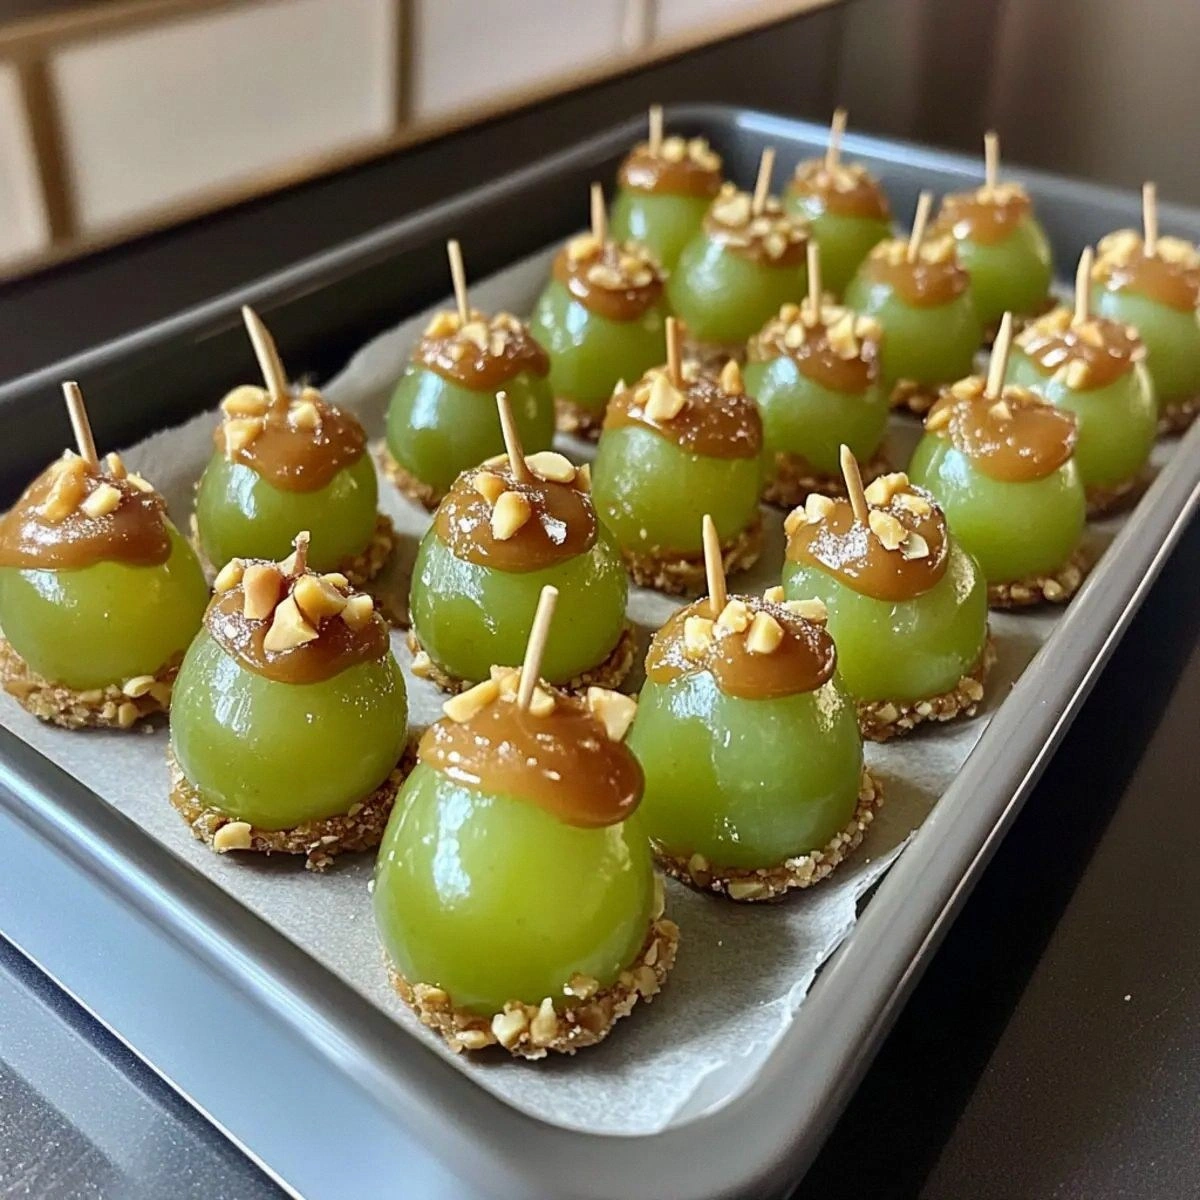
I was standing in my kitchen, staring at a half‑empty bowl of grapes that had somehow turned into a sad, wilted garnish for a salad I never finished. The clock was ticking, my stomach was growling, and a dare from my roommate echoed in my head: “Make something that tastes like a carnival, but don’t use an oven.” I grabbed the nearest bag of seedless green grapes, a tub of caramel bits, and a jar of heavy whipping cream, and what happened next was nothing short of a culinary epiphany. This wasn’t just a snack; it was a revelation that turned a boring fruit bowl into a glossy, buttery masterpiece that could make even the most stubborn sweet‑tooth squeal with delight.
Imagine the scent of fresh grapes mingling with the warm, buttery caramel that drifts through the kitchen like a sweet fog. You hear the faint crackle of caramel bits melting, a sound that promises indulgence, and you feel the smooth, cool surface of the grapes as you toss them in the glossy sauce. The texture? A perfect marriage of juicy fruit, silky caramel coating, and a satisfying crunch from roasted peanuts that snap like fireworks on New Year’s Eve. The flavor? It’s like biting into a caramel‑kissed apple, but with the bright zing of green grapes that keep the whole thing from feeling heavy. In short, it’s a snack that sings, dances, and leaves you begging for an encore.
Most recipes for caramel‑coated fruit either drown the fruit in syrup or require a bake‑out that turns the grapes mushy and loses their snap. I’ve tried those, and let me be honest — I ate half the batch before anyone else got a chance to try it because the flavor was that addictive. This version, however, stays true to the fruit’s natural juiciness while wrapping it in a silky caramel glaze that sets up in the fridge, not the oven. The secret? A dash of heavy whipping cream that turns the caramel bits into a glossy, velvety sauce that clings to each grape like a second skin, and a quick roll in peanuts that adds an unexpected crunch. I dare you to taste this and not go back for seconds.
I’m about to walk you through every single step — from selecting the perfect grapes to achieving that glossy coat without a single burn. By the end, you’ll wonder how you ever made this snack any other way, and you’ll have a go‑to no‑bake treat that can be whipped up in under an hour. Okay, ready for the game‑changer?
What Makes This Version Stand Out
- Taste: The caramel‑cream sauce delivers a buttery sweetness that balances the natural tartness of the grapes, creating a flavor duet that feels both familiar and novel.
- Texture: Juicy, bite‑size grapes meet a silky coating and a crunchy peanut finish, giving you three distinct mouthfeels in every bite.
- Simplicity: No oven, no fancy equipment—just a saucepan, a bowl, and a handful of pantry staples.
- Uniqueness: Most caramel fruit snacks use apples or bananas; grapes are the underdog that brings a fresh, crisp edge to the party.
- Crowd Reaction: This snack turns skeptics into believers; it’s the kind of surprise that makes guests ask for the recipe before they even finish the first bite.
- Ingredient Quality: Using seedless green grapes and premium caramel bits ensures each component shines without any gritty or bitter notes.
- Make‑Ahead Potential: The glaze sets beautifully in the fridge, so you can prep a batch the night before and have a ready‑to‑serve treat for any occasion.
Inside the Ingredient List
The Flavor Base
The star of the show is the caramel bits. These little nuggets are already caramelized, meaning they melt into a buttery river of gold the moment they meet heat. If you skip them, you’ll end up with a bland glaze that lacks depth. As a swap, you can use a good quality store‑bought caramel sauce, but make sure it’s thick enough to coat the grapes without turning watery.
The Texture Crew
Heavy whipping cream is the secret weapon that transforms caramel bits into a glossy, velvety coating. The fat content creates a smooth emulsion that clings like silk. If you’re dairy‑free, try coconut cream; it adds a subtle tropical note that pairs surprisingly well with the grapes.
The Unexpected Star
Chopped peanuts bring that satisfying crunch that prevents the snack from feeling like a sugar bomb. Their earthy, roasted flavor cuts through the sweetness, creating a balanced bite. If peanuts aren’t your thing, try toasted almond slivers or even crushed pretzels for a salty twist.
The Final Flourish
Seedless green grapes are the canvas. Their natural sweetness and firm bite provide the perfect contrast to the rich caramel. When shopping, look for plump, unblemished grapes that feel firm to the touch; avoid any that have soft spots or are overly shiny, as they may be over‑ripe and soggy.
Everything’s prepped? Good. Let’s get into the real action…
The Method — Step by Step
-
Start by giving your grapes a quick rinse under cold water, then pat them dry with a clean kitchen towel. I like to spread them out on a large plate so they’re not steaming each other. This is the moment where you’ll notice the natural sheen of the grapes, a perfect canvas for what’s coming. Watch the moisture level — if they’re too wet, the caramel won’t stick.
Kitchen Hack: Toss the dried grapes in a tablespoon of lemon juice; the acid creates a micro‑film that helps the caramel adhere without making the grapes mushy. -
Grab a medium saucepan and set it over medium‑low heat. Add the 1 cup of caramel bits and let them melt, stirring gently with a silicone spatula. As the bits dissolve, pour in the 1/4 cup of heavy whipping cream. The mixture will bubble softly, releasing a buttery aroma that fills the kitchen like a warm hug.
Keep the heat low; you want a gentle simmer, not a rolling boil. The sauce should thicken just enough to coat the back of a spoon — think of it as a glossy glaze that clings like a second skin. This is the moment of magic, the point where sugar transforms into silk.
-
Now, the real fun begins. Transfer the melted caramel‑cream mixture into a wide mixing bowl. Using a large slotted spoon, dump in half of your grapes and give them a gentle toss, ensuring each grape is fully immersed in the glaze. You’ll hear a faint sizzle as the cold fruit meets the warm sauce — that’s the sound of flavor bonding.
Once every grape looks like it’s been dipped in liquid gold, use the slotted spoon to lift them out, letting excess sauce drip back into the bowl. Lay the coated grapes on a parchment‑lined tray, spreading them out so they don’t stick together.
-
While the first batch is still warm, sprinkle the 1/2 cup of chopped peanuts over them, rolling each grape gently to ensure an even coating. The peanuts should adhere instantly, forming a crunchy shell that will stay crisp after chilling.
Repeat the coating process with the remaining grapes, making sure each batch gets its full peanut hug. This step is where the snack earns its “crunch factor” — if you skip it, you’ll miss the textural contrast that makes this recipe unforgettable.
Watch Out: If the caramel sauce gets too hot, it can scorch and turn bitter. Keep the temperature low and stir constantly to avoid a burnt taste. -
Once all grapes are coated and rolled in peanuts, transfer the tray to the refrigerator. Let them chill for at least 20 minutes; this solidifies the glaze and locks in the crunch.
During this time, you’ll notice the sauce turning from a glossy liquid to a firm, candy‑like shell that snaps when you bite. That transformation is the hallmark of a successful no‑bake caramel coating.
-
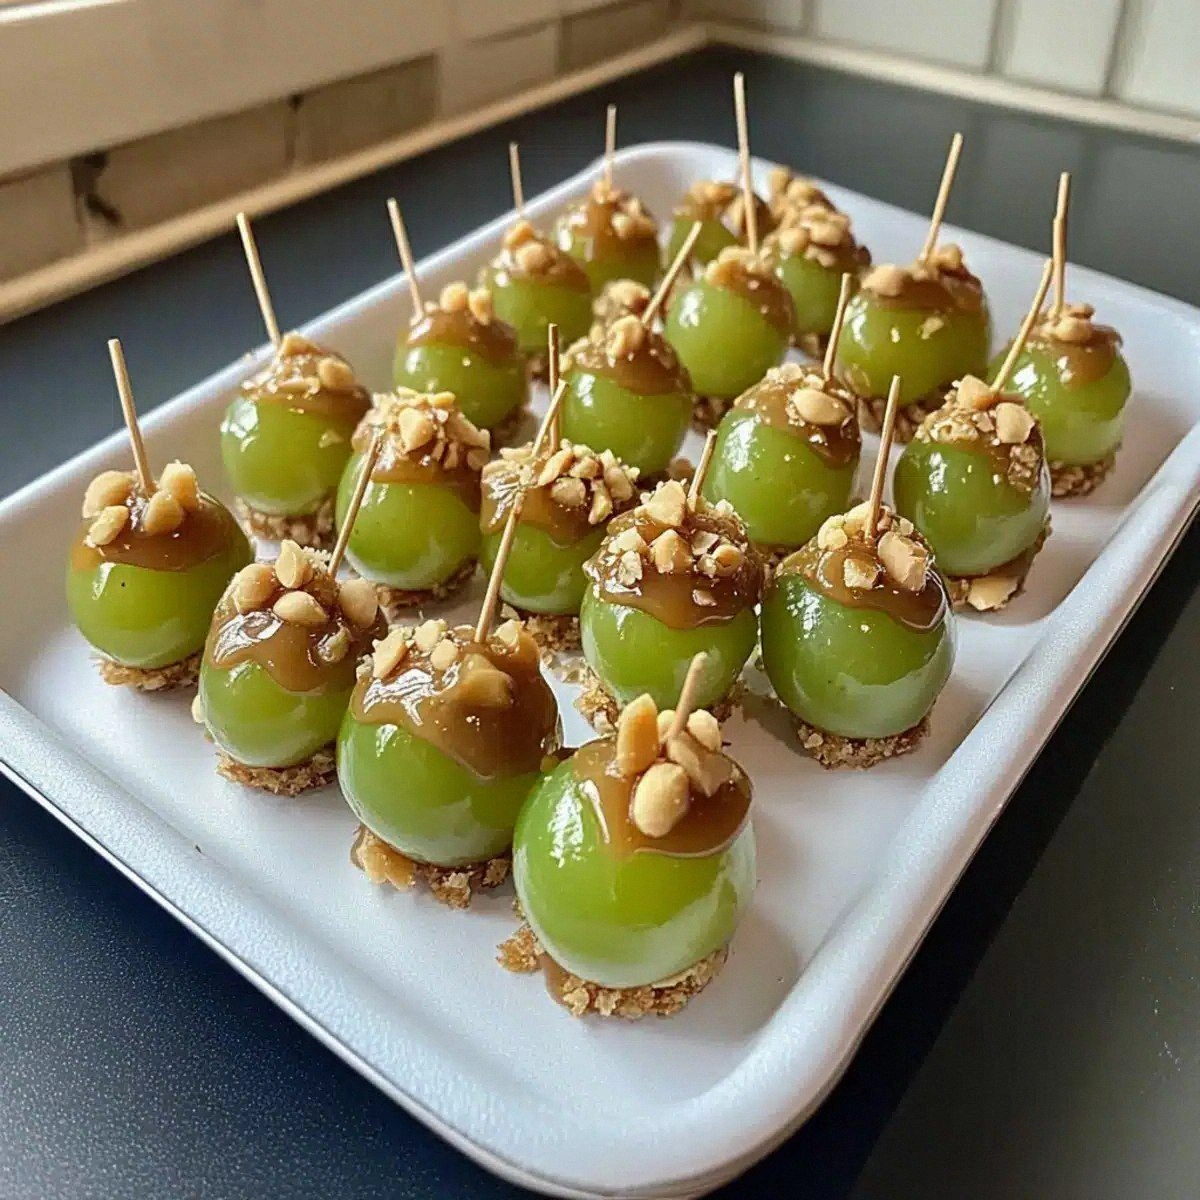
After chilling, pull the tray out and give the grapes a final visual inspection. They should look like tiny, jeweled gems — each grape encased in a caramel‑peanut armor that glints in the light.
If any grapes look a little shy and haven’t fully set, give them an extra 5‑minute chill. This extra step ensures every bite is uniformly crunchy and glossy.
-
Serve the caramel apple grapes on a decorative platter, or portion them into individual snack cups for a party‑ready presentation. They’re perfect as a pre‑dessert bite, a movie‑night treat, or a whimsical addition to a brunch buffet.
And now the fun part: watch your guests’ faces light up as they bite into that perfect combination of sweet, juicy, and crunchy. I dare you to keep a straight face while they devour the whole batch.
-
That’s it — you did it. But hold on, I’ve got a few more tricks that’ll take this to another level. From a quick drizzle of dark chocolate to a sprinkle of sea salt, the possibilities are endless, and I’ll spill the beans in the next sections.
Insider Tricks for Flawless Results
The Temperature Rule Nobody Follows
Keep the caramel‑cream mixture below 180°F (82°C). Anything higher will cause the sugars to break down and develop a bitter edge. I once let the sauce boil and ended up with a burnt taste that no amount of peanuts could mask. Use an instant‑read thermometer and stay in the sweet spot for a glossy, buttery finish.
Why Your Nose Knows Best
When the sauce starts to emit that buttery, toasted aroma, you’re at the perfect moment to dip the grapes. Trust your sense of smell more than a timer; the scent tells you when the caramel has reached its optimal viscosity. If you wait too long, the sauce thickens too much and won’t coat evenly.
The 5‑Minute Rest That Changes Everything
After coating, let the grapes rest for exactly five minutes before rolling them in peanuts. This short pause lets the caramel set just enough to grab onto the nuts without sliding off. Skipping this rest results in a sloppy coating that falls apart on the plate.
The Peanut Toast Trick
Before you chop your peanuts, toast them lightly in a dry skillet for 2‑3 minutes. The extra toasty flavor adds depth and prevents the nuts from tasting raw. A friend tried skipping this step once — the end result was bland and the peanuts felt “off‑season”.
The Citrus Brightener
A tiny squeeze of fresh lemon juice into the caramel‑cream mixture adds a subtle brightness that lifts the overall sweetness. It’s like adding a splash of sunshine to a dessert. Just a teaspoon is enough; more will make the sauce too runny.
Creative Twists and Variations
This recipe is a playground. Here are some of my favorite ways to switch things up:
Chocolate‑Covered Delight
After the caramel coating, drizzle dark chocolate over the grapes and let it set. The bitter chocolate balances the sweet caramel, creating a sophisticated flavor duo that will wow any chocolate lover.
Spicy Kick
Add a pinch of cayenne pepper to the caramel‑cream sauce. The subtle heat cuts through the sweetness and adds an unexpected zing that pairs beautifully with the fruit’s acidity.
Nut‑Free Crunch
Swap peanuts for toasted pumpkin seeds or sunflower seeds. This keeps the snack allergen‑friendly while still delivering that satisfying crunch.
Berry‑Boosted Version
Use a mix of red grapes and strawberries for a colorful, multi‑fruit version. The strawberries add a burst of tartness that contrasts nicely with the caramel.
Salted Caramel Surprise
Finish the chilled grapes with a light sprinkle of flaky sea salt. The salt amplifies the caramel’s depth and makes each bite pop with flavor.
Coconut Whisper
Replace half of the heavy whipping cream with coconut cream and toss in toasted coconut flakes instead of peanuts. The result is a tropical twist that feels like a beach vacation in your mouth.
Storing and Bringing It Back to Life
Fridge Storage
Place the coated grapes in an airtight container lined with parchment paper. They’ll stay fresh for up to three days, retaining their crunch and glossy coating. Keep them on the middle shelf where temperature is most stable.
Freezer Friendly
If you want to make a big batch, freeze the grapes on a single layer on a baking sheet, then transfer to a zip‑top freezer bag. They’ll keep for up to two months. Thaw them in the fridge for an hour before serving to avoid condensation.
Best Reheating Method
When you’re ready to serve frozen grapes, pop them in the microwave for 15‑20 seconds, then add a tiny splash of water to the bowl and give them a quick toss. The steam revives the caramel’s gloss without making the grapes soggy.